Sunday, 20 November 2016

10 things every new Mac owner should know

Your new Mac is easy to set up and use. Make sure you know these important basics after you get started.
So, you've finally jumped ship and entered the Apple ecosystem. Welcome to the family! We Mac users love to share our knowledge, so please join the iMore forums if you have any questions. In the meantime, here are a few tips you should know about using your new Mac.

1. Set up a backup plan for your Mac

Time Machine on Mac
No matter how much you store in iCloud, you should always back up your Mac. Time Machine is the easiest method, but there are other plans that might work better for you. The choice is yours.

2. Sign into iCloud

iCloud on Mac
One of the best reasons to switch to Mac is the Apple ecosystem, which is largely fueled by iCloud syncing. You can access photos, documents, movies, music, and more, all with your iCloud account. So, make sure you are signed in to iCloud using the Apple ID you use to sync your iOS, tvOS, and watchOS data.

3. Sign into iTunes

iTunes on Mac
iTunes is installed on your new Mac when you get started. If, for some reason, you don't have the iTunes app, you can manually download it from Apple. iTunes is where you store all of your movies, tv shows, iBooks, apps, music, and more. Even if you don't keep your media on your Mac, you can download purchased content right from iTunes.
Advertisement

4. Set up Email and Calendar

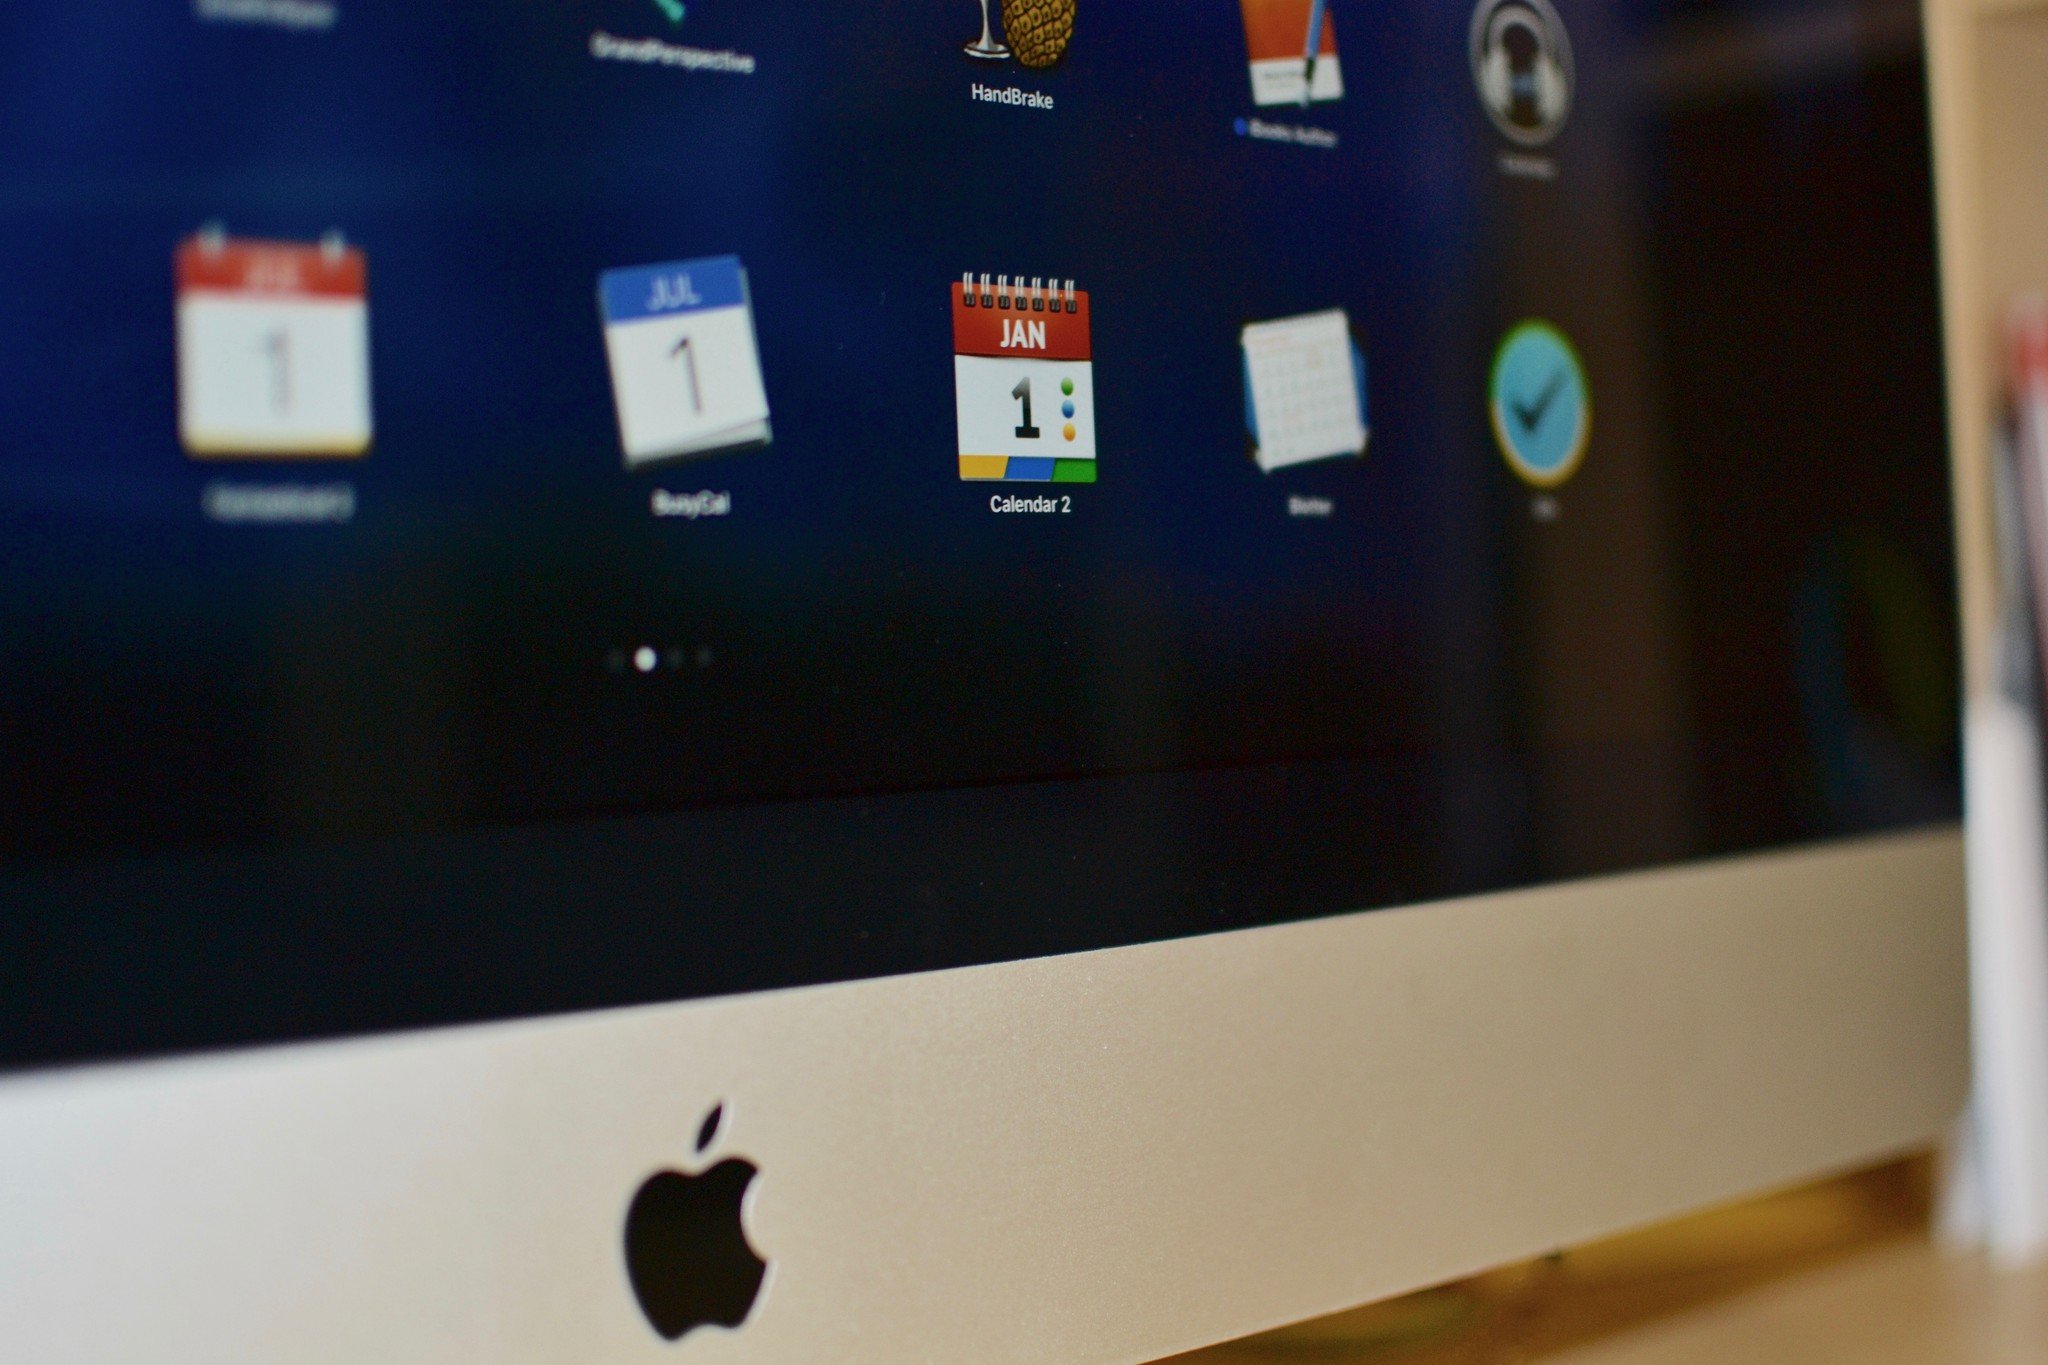
Calendars apps on Mac
Although there are a number of fantastic email and calendar apps for the Mac, you should still set up the built-in Mail and Calendar apps on your Mac. Partly because some apps use them as a jumping off point for syncing data (mostly just iCal, actually), and partly because you never know when your favorite third-party app will stop working. The built-in Mail and Calendar apps will most likely always be supported by Apple.

5. Set up Optimized Storage

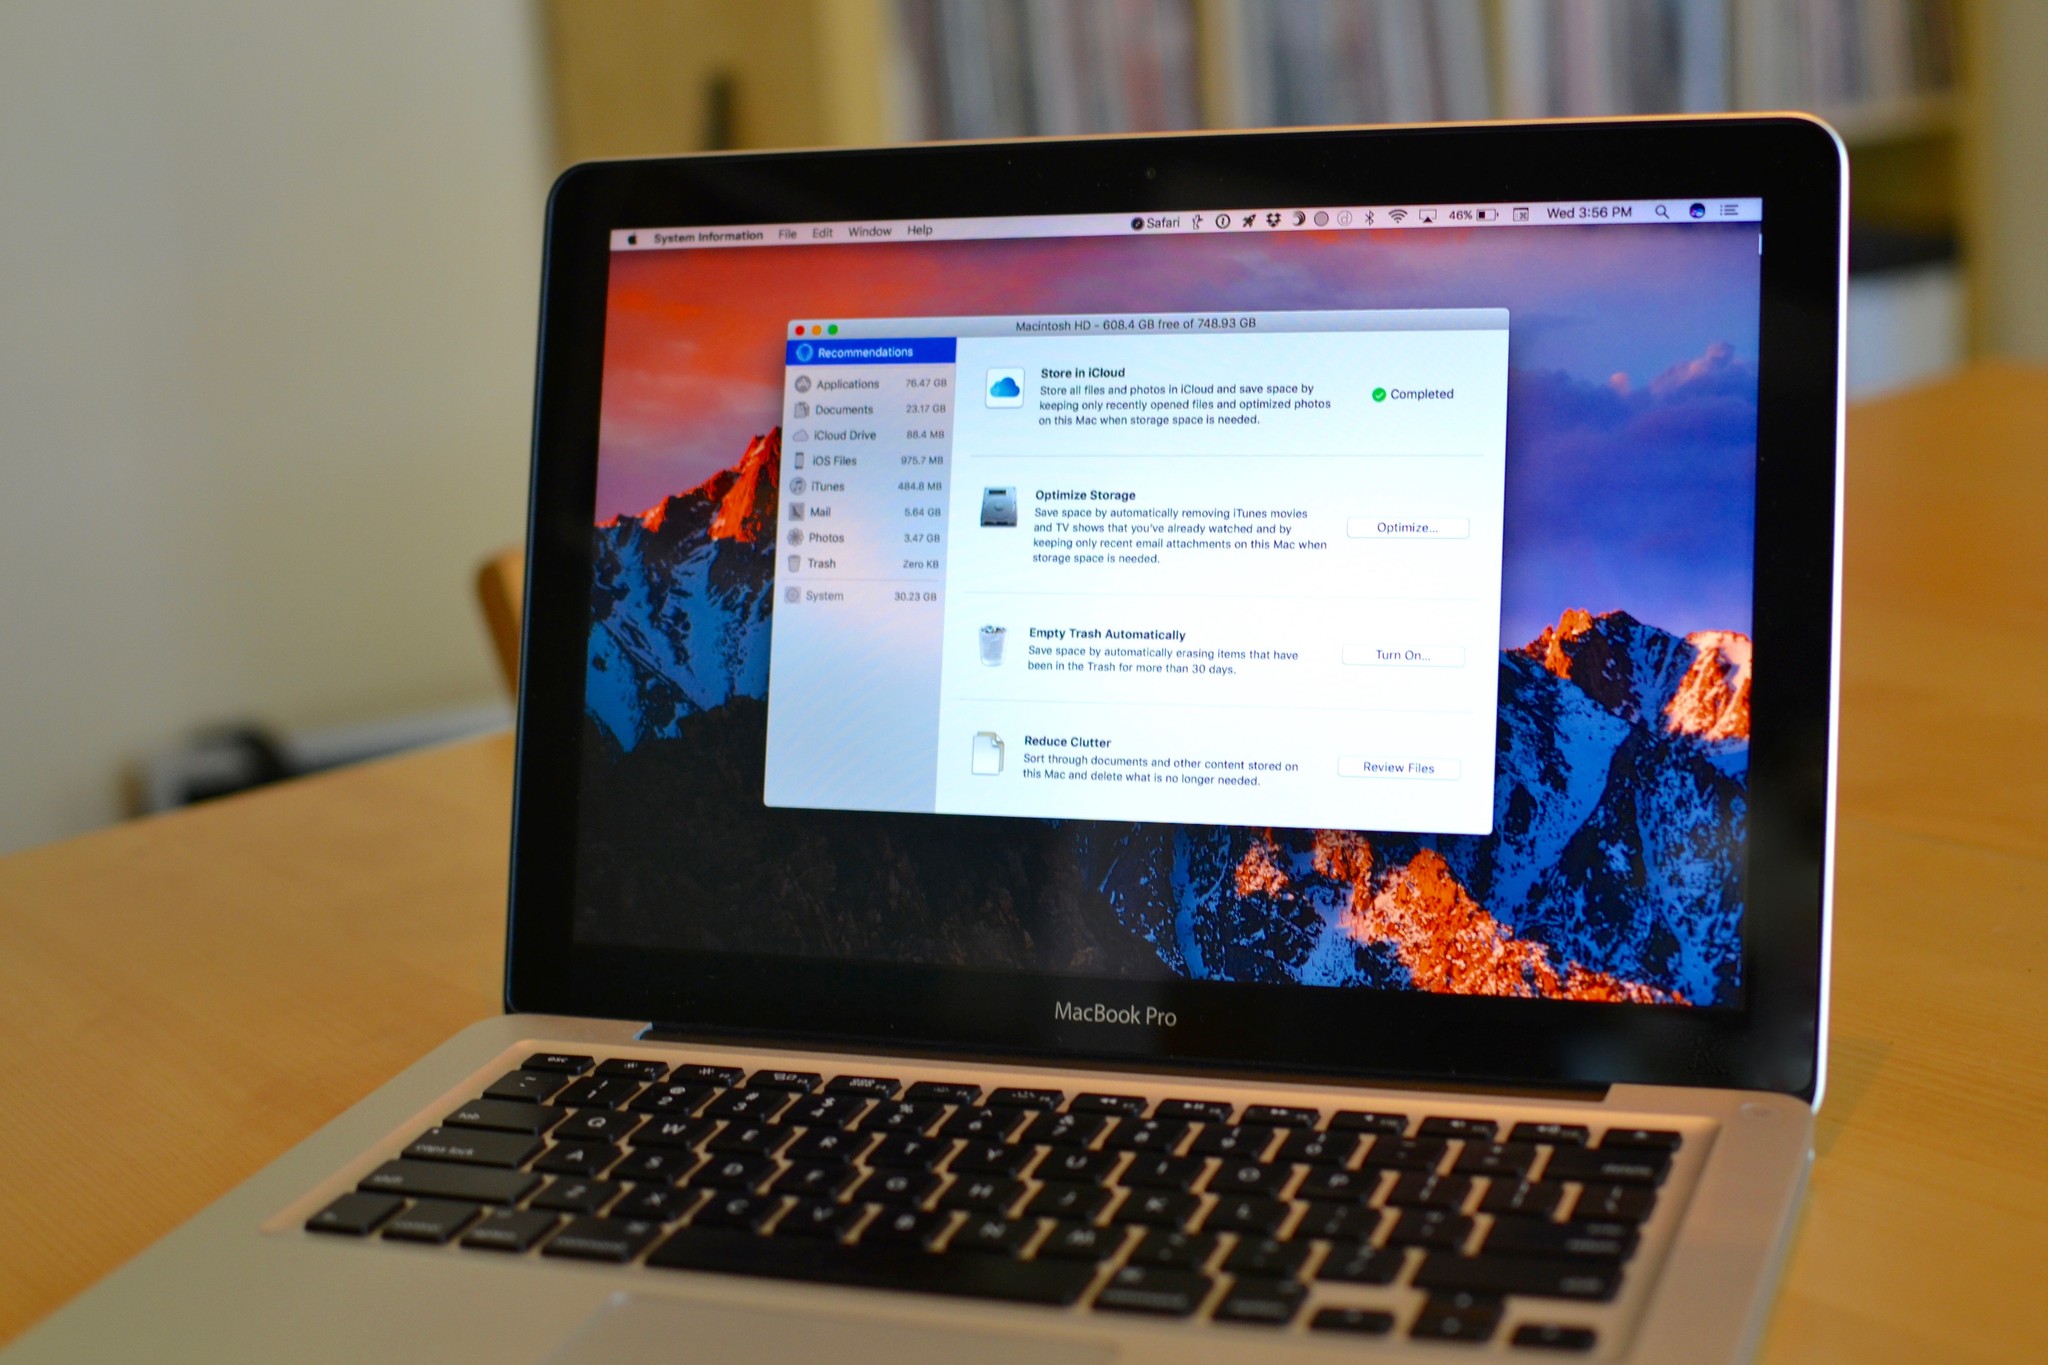
Optimized Storage on Mac
Apple has developed a great way for you to keep your Mac's hard drive from getting too full. Using a number of iCloud syncing options, as well as a healthy clutter cleaning regimen, you can keep your hard drive free for more important downloads.

6. Set up automatic downloads

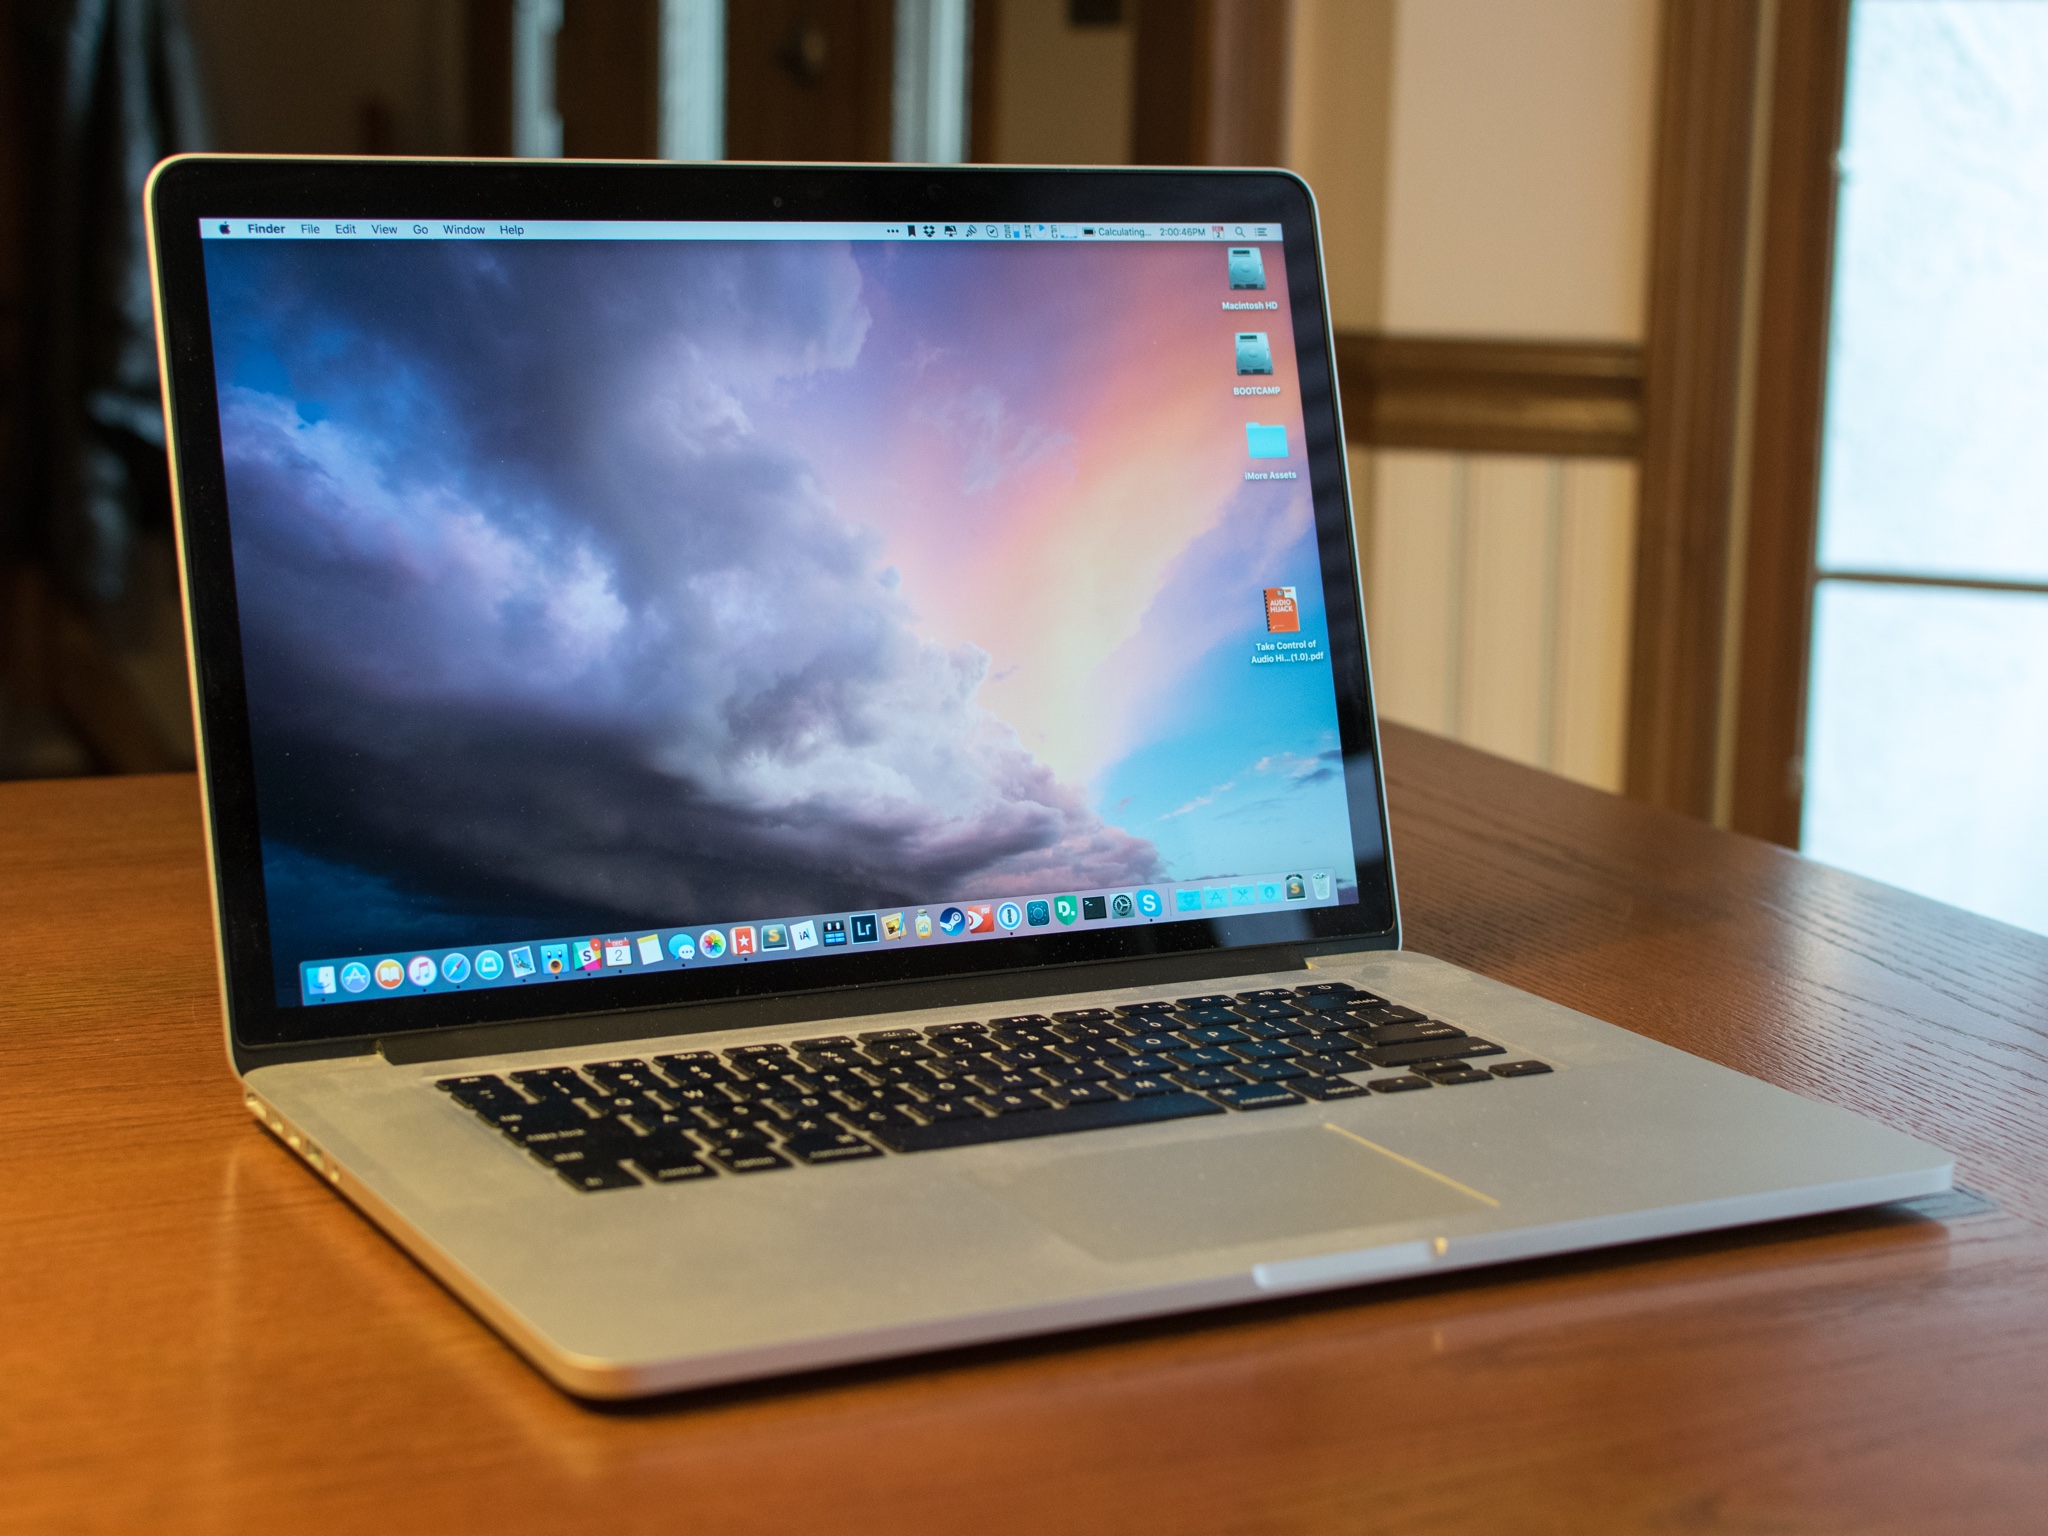
MacBook
Apple regularly updates macOS with new and awesome features. Some Mac app developers also like to keep things ticking with regular updates. You can ensure you don't miss anything by setting up automatic downloads, which will run in the background.

7. Connect your printer

AirPrint
Peripherals like a keyboard, trackpad, and mouse are all important to getting the most out of your Mac, but you should also think about setting up a printer. Even if you don't need it now, you will probably need one at some point, and you don't want to be rushing around at the last minute.

8. Download apps and games

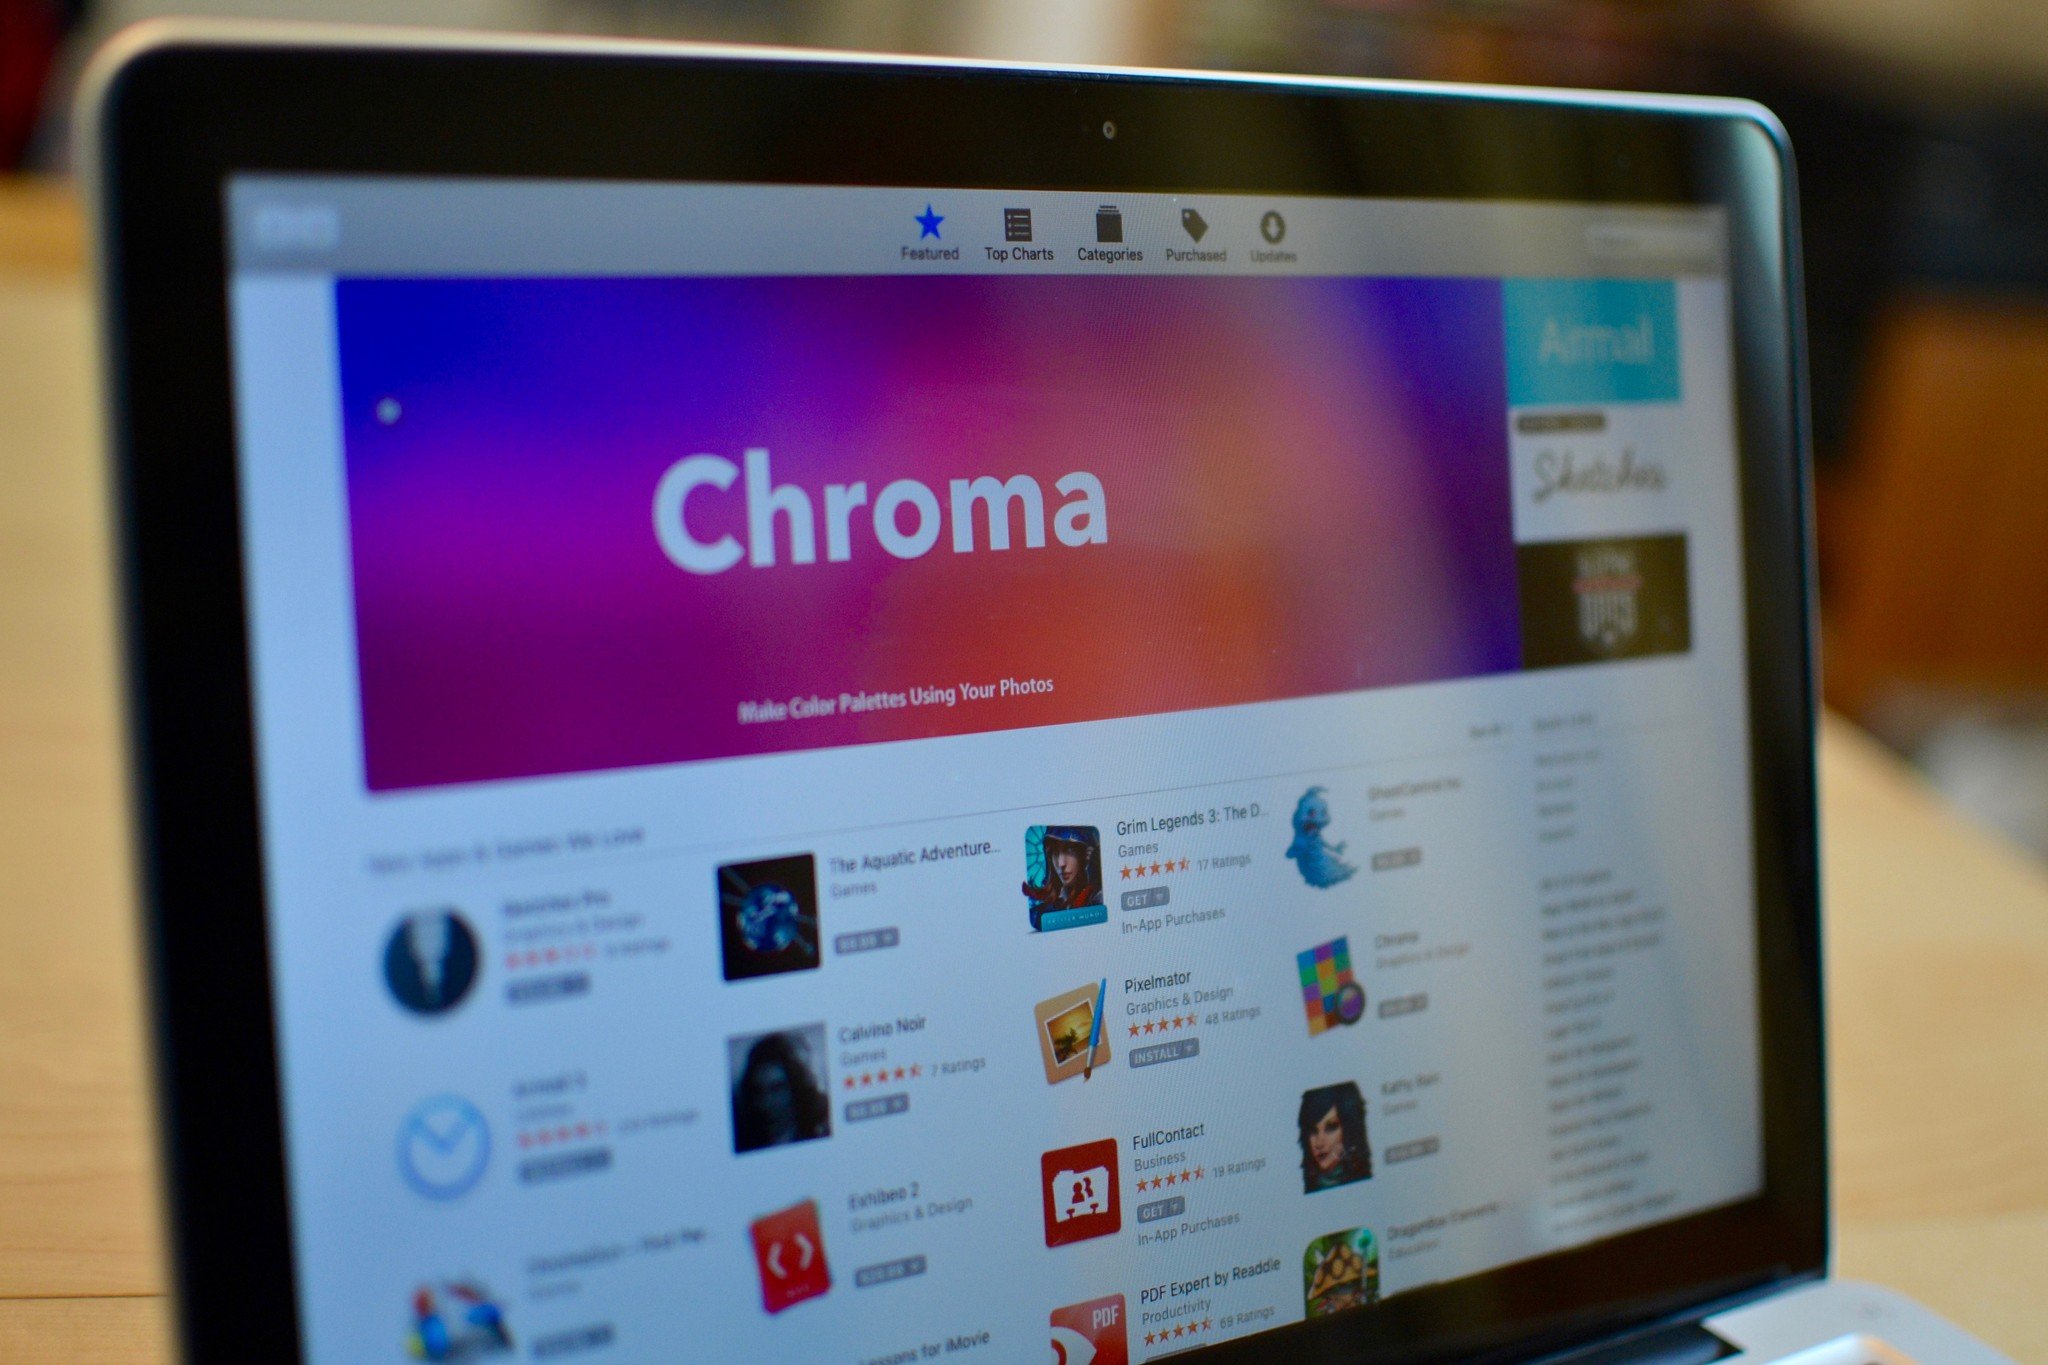
Mac App Store
As much as Apple gives you plenty of programs to help get you started on your Mac, there are still plenty of apps you will need for productivity, entertainment, and more. That's where the Mac App Store comes in. You can find almost every type of app in the Mac App Store. Once you download an app, it is available on all other Macs synced with your Apple ID for as long as the app is in the Mac App Store.

9. Integrate your social media

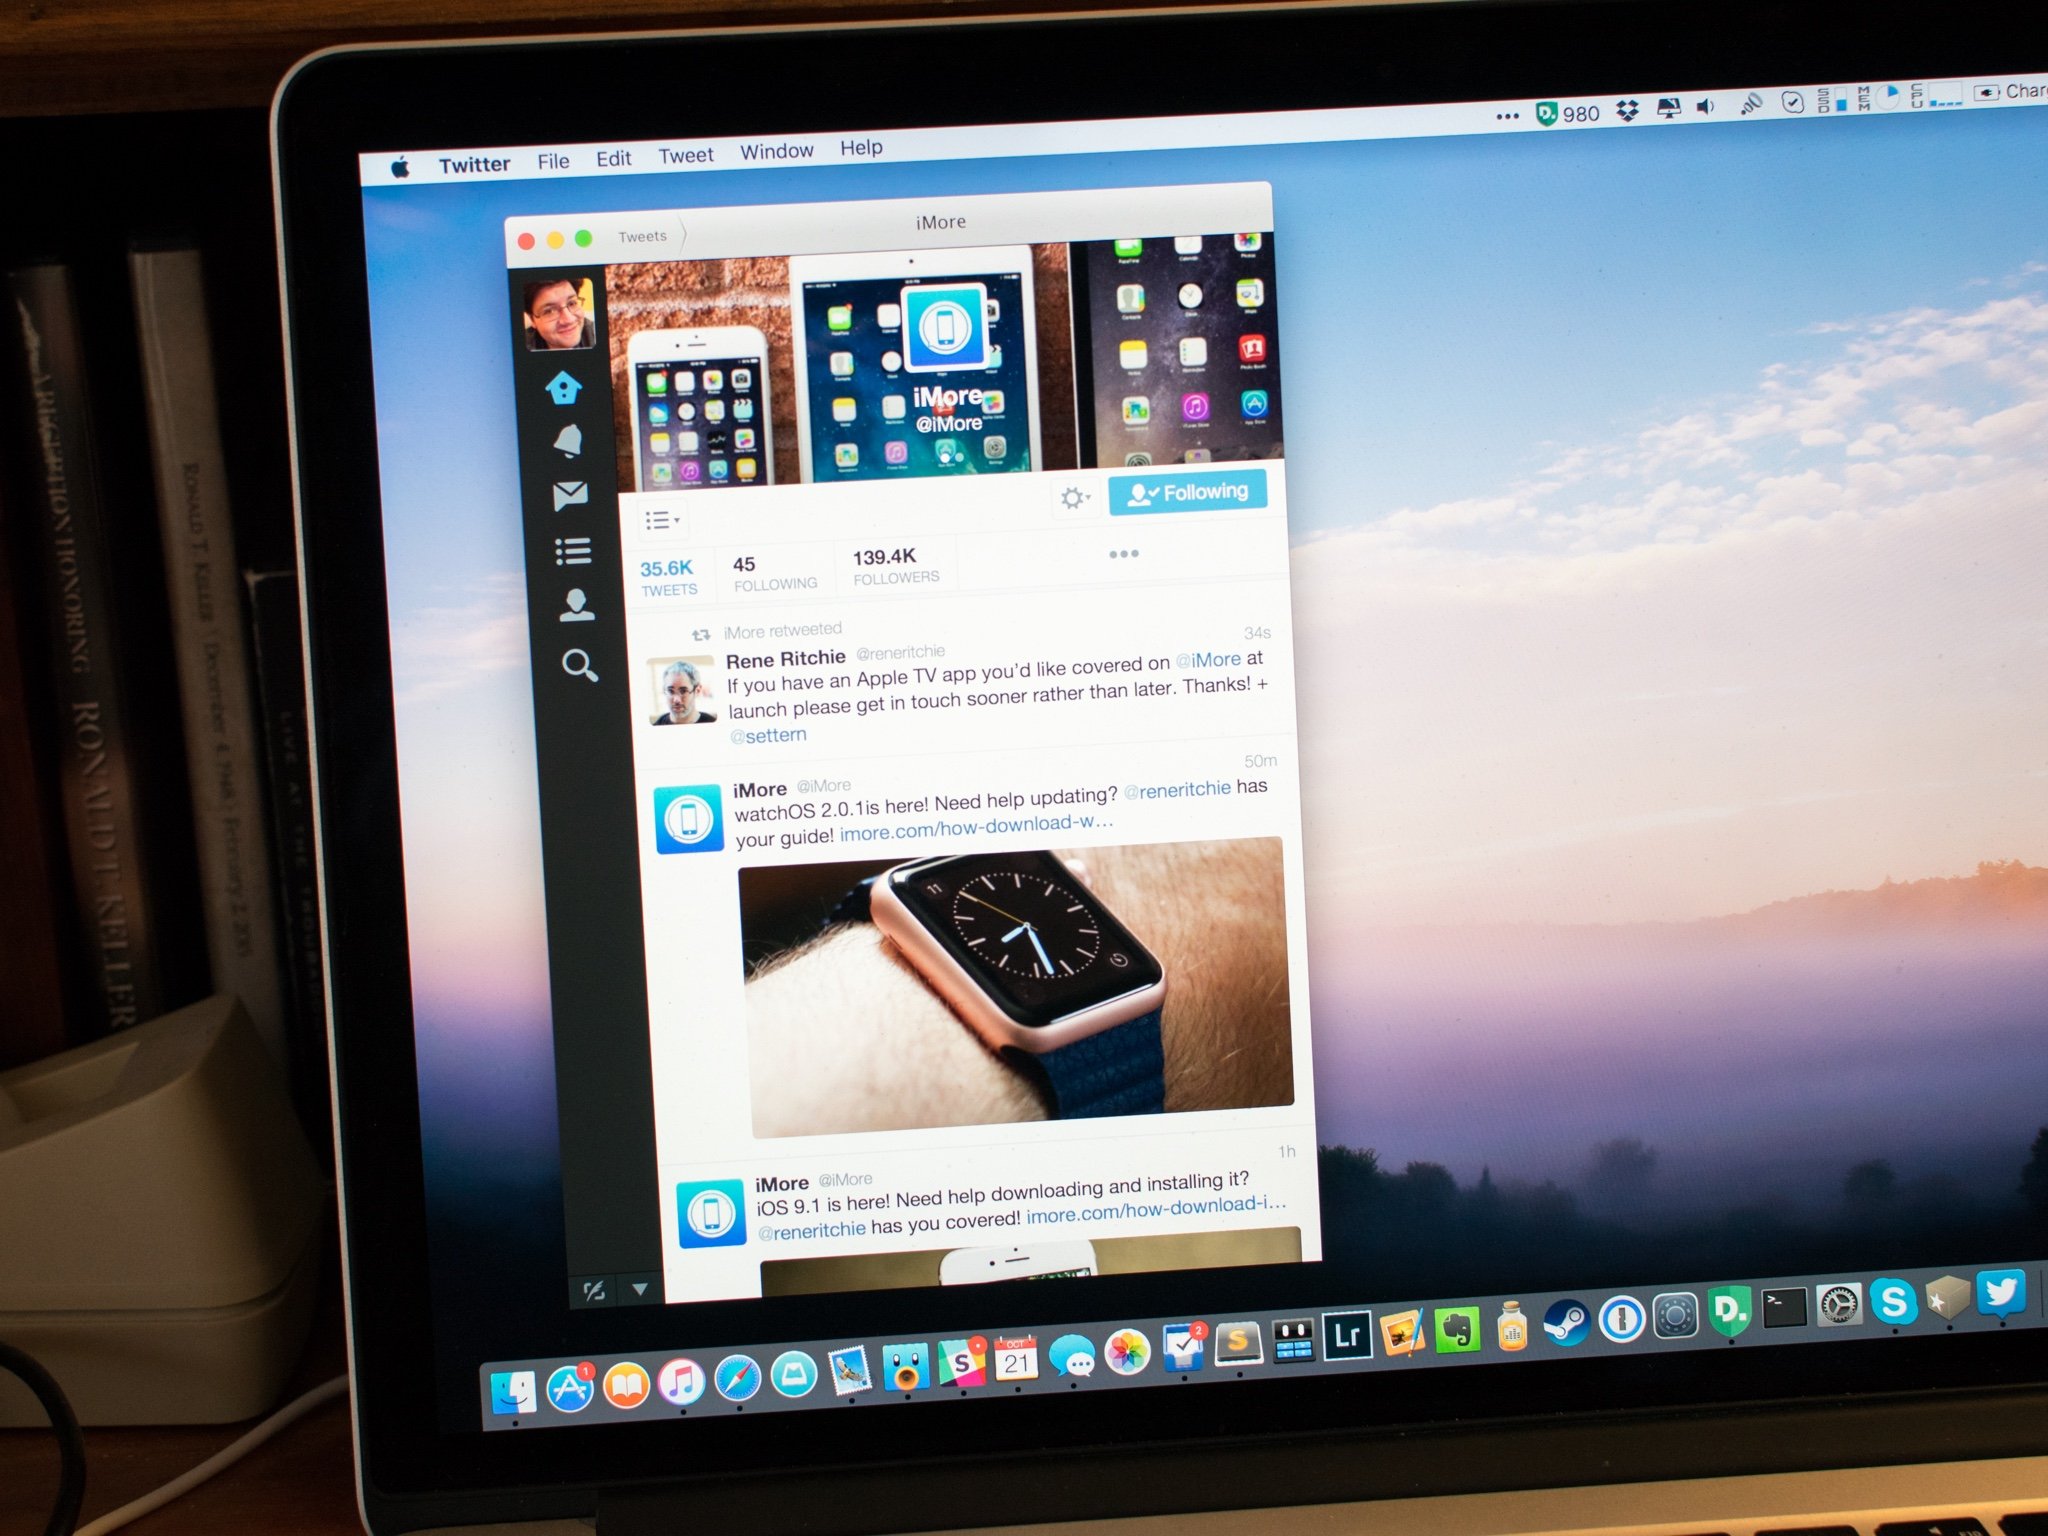
Twitter on Mac
When you sign into Facebook and Twitter on your Mac, you will be able to take advantage of systemwide integration without even needing a separate app. You can have Siri update your Facebook status or see Twitter alerts in Notification Center. You can tweet pictures and share videos on Facebook. To sign in to Facebook and Twitter, open System Preferences > Users & Groups, and select your social networking account. Sign in with your user name and password to get started.

10. Get to know Spotlight

Spotlight on Mac
Spotlight is your go-to program for finding practically everything you need on your Mac or on the Web. You can look up directions using Maps, open a Terminal window, find utilities you didn't know you had, and more. All you have to do is click on the search icon in the upper right corner of your Mac's screen and type in a word or phrase. Spotlight will search through all of your files, folders, emails, and documents to find the right content. If that's not enough, Spotlight will also search through your entire computer system, and even looks stuff up on the web.


How does Touch ID work? and more isue about touch id

How does Touch ID work?

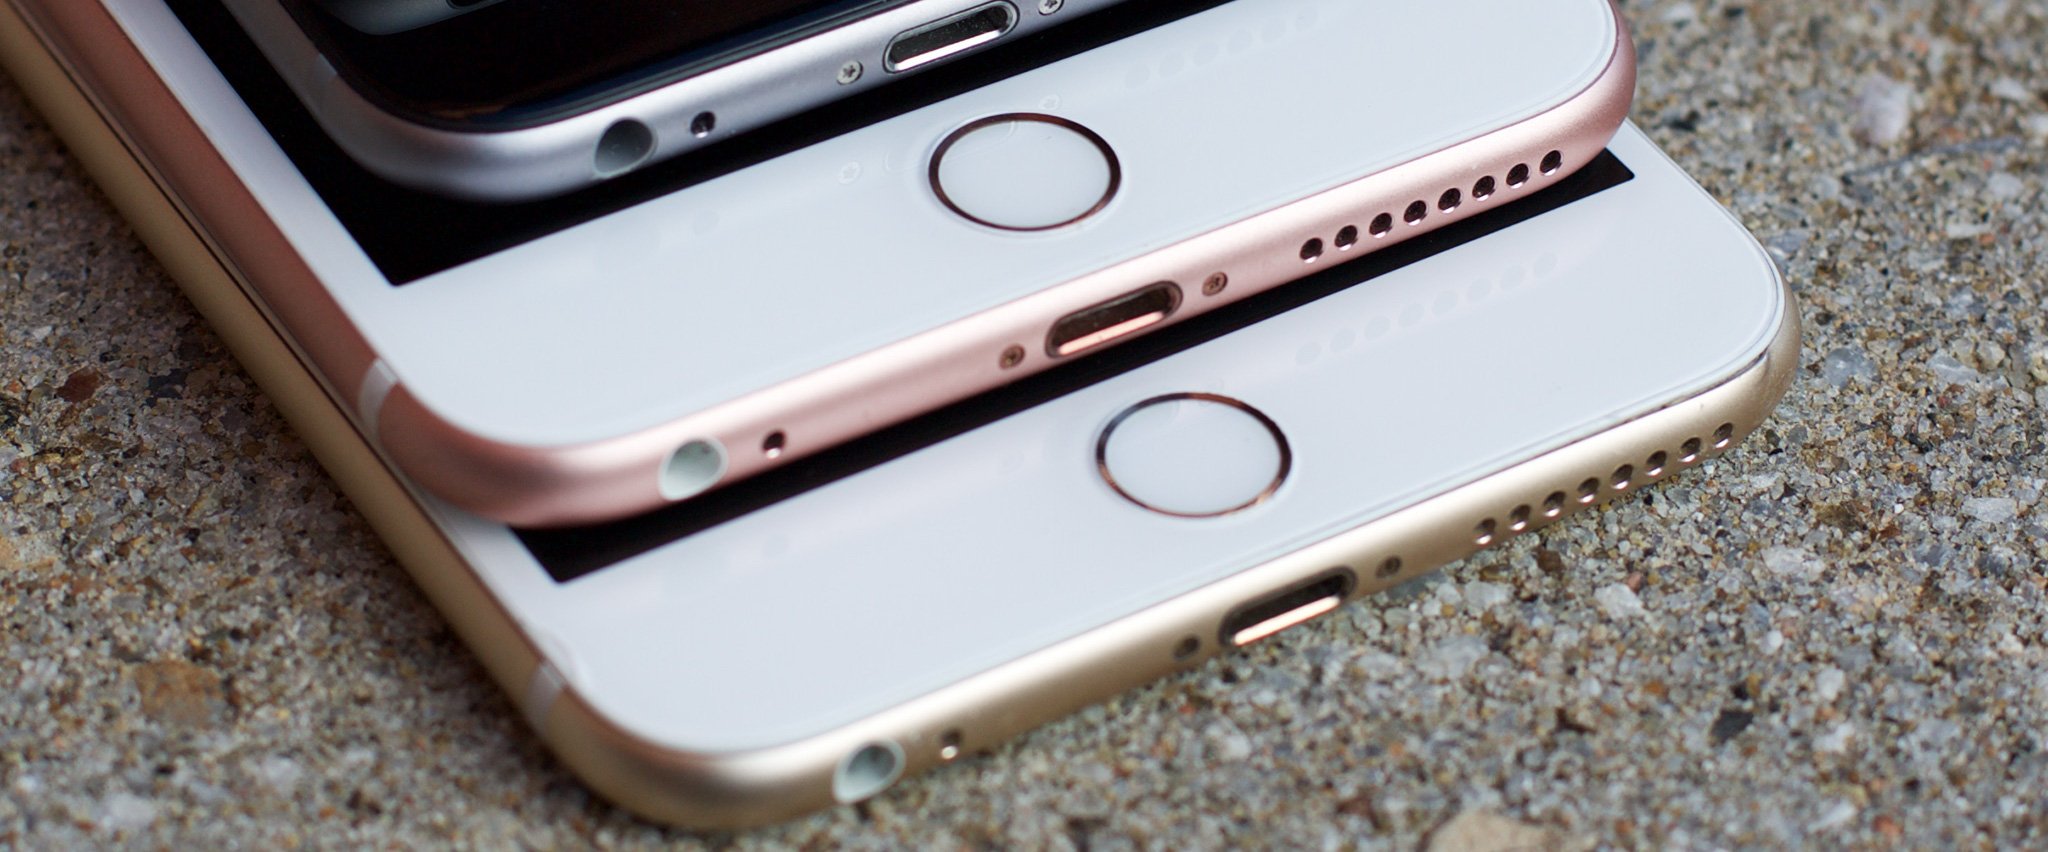
Multiple iPhones are stacked showing the Touch ID sensor.
On an iOS device, there's a capacitive ring around the Touch ID sensor; on the new MacBook Pro, the entire Touch ID sensor is capacitive. When the sensor detects a finger, it triggers a high-resolution image capture. That image is converted into a mathematical representation, which is then sent through the hardware channel to a secure enclave. If the representation matches what's stored in the enclave, a "yes" token is released and the Touch ID action is authenticated. If not, a "no" token is released, and all you get is a digital head shake. Every time Touch ID scans a finger and recognizes it, it adds additional detail to the representation, theoretically to make it register even faster and better in the future.

Troubleshooting trippy Touch ID authentication

Here are a few tips and tricks to try if you're experiencing Touch ID issues:
  • During the registration process, make sure you move your finger around enough that the entire surface gets scanned during the first stage, and then every edge gets scanned during the second phase.
  • Any sweat or liquid on your finger at all can interfere with the scan. Wipe both your finger and the Home button off and dry then completely before using Touch ID.
  • The sequential improvement process can sometimes go off-track (i.e. instead of getting better, an error can occur and it can get worse). When that starts to happen, delete the fingerprint and re-register.
  • On an iOS device, make sure your finger is touching the capacitive metal ring and the Home button.
  • Touch ID is super fast these days, but you should still refrain from lifting your finger too quickly.
  • Try to keep your finger in one place when you're authenticating — you don't want to move your finger around too much.
  • If you're rockin' a screen protector or case, you don't want it to cover up the capacitive ring or the Home button — that could cause errors with Touch ID authentication.
  • If all else fails, it's time to head to the Apple Store for one-on-one support.

How to delete and re-add your Touch ID fingerprints

Sometimes you've just gotta burn it to the ground and start anew.

How to delete and re-add your Touch ID fingerprints on Mac

Serenity Caldwell put together an extensive guide on Touch ID for the new MacBook Pro. You can check it out at the link below!

How to delete and re-add your Touch ID fingerprints on iOS

If you're having trouble with Touch ID on an iOS device, here's how you wipe the slate clean and start again!
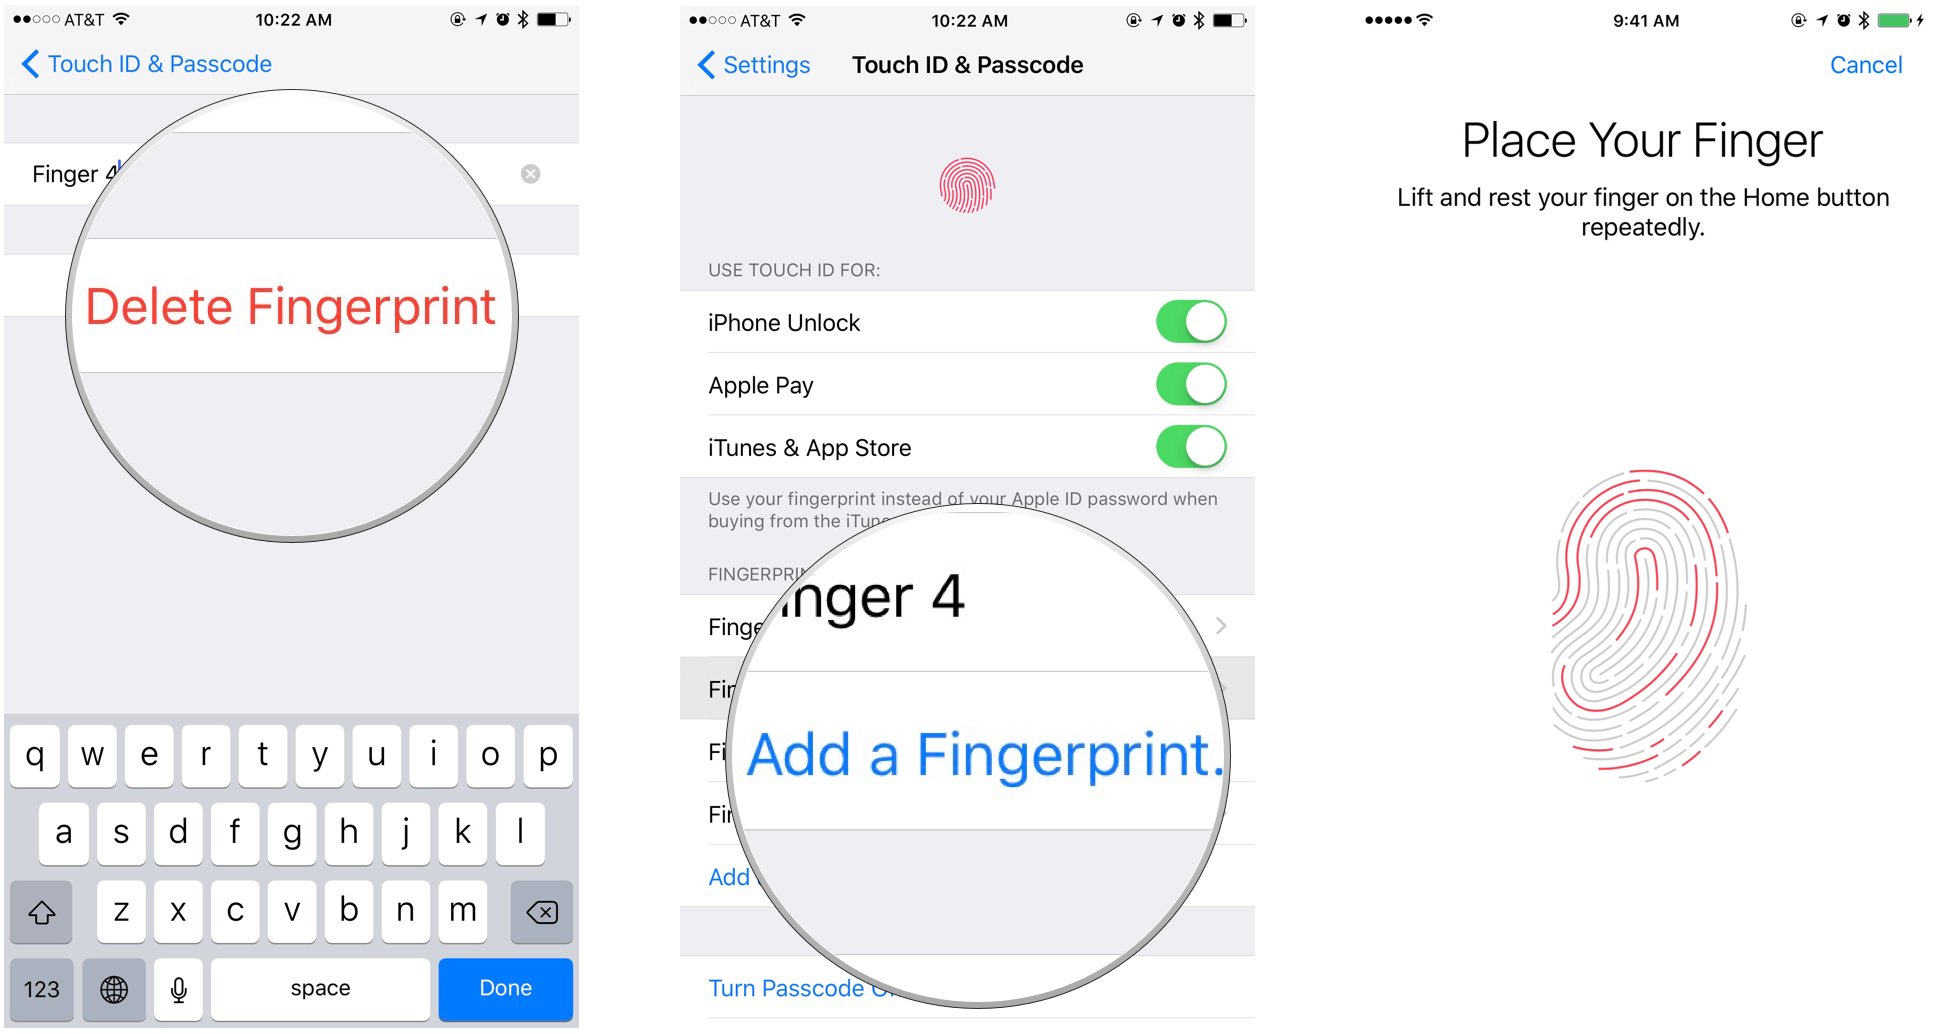
  1. Launch the Settings app.
  2. Tap on Touch ID & Passcode.
  3. Type in your Passcode when prompted.
  4. Tap on any fingerprint.
    Setting up Touch ID on iOS
  5. Tap on Delete Fingerprint. Repeat this until all your fingerprints are removed.
  6. Tap on Add a Fingerprint...
  7. Follow the on-screen prompts to set up a new fingerprint.
    Setting up Touch ID on iOS

How to create a new Apple ID on your iPhone or iPad

How to create a new Apple ID on your iPhone or iPad

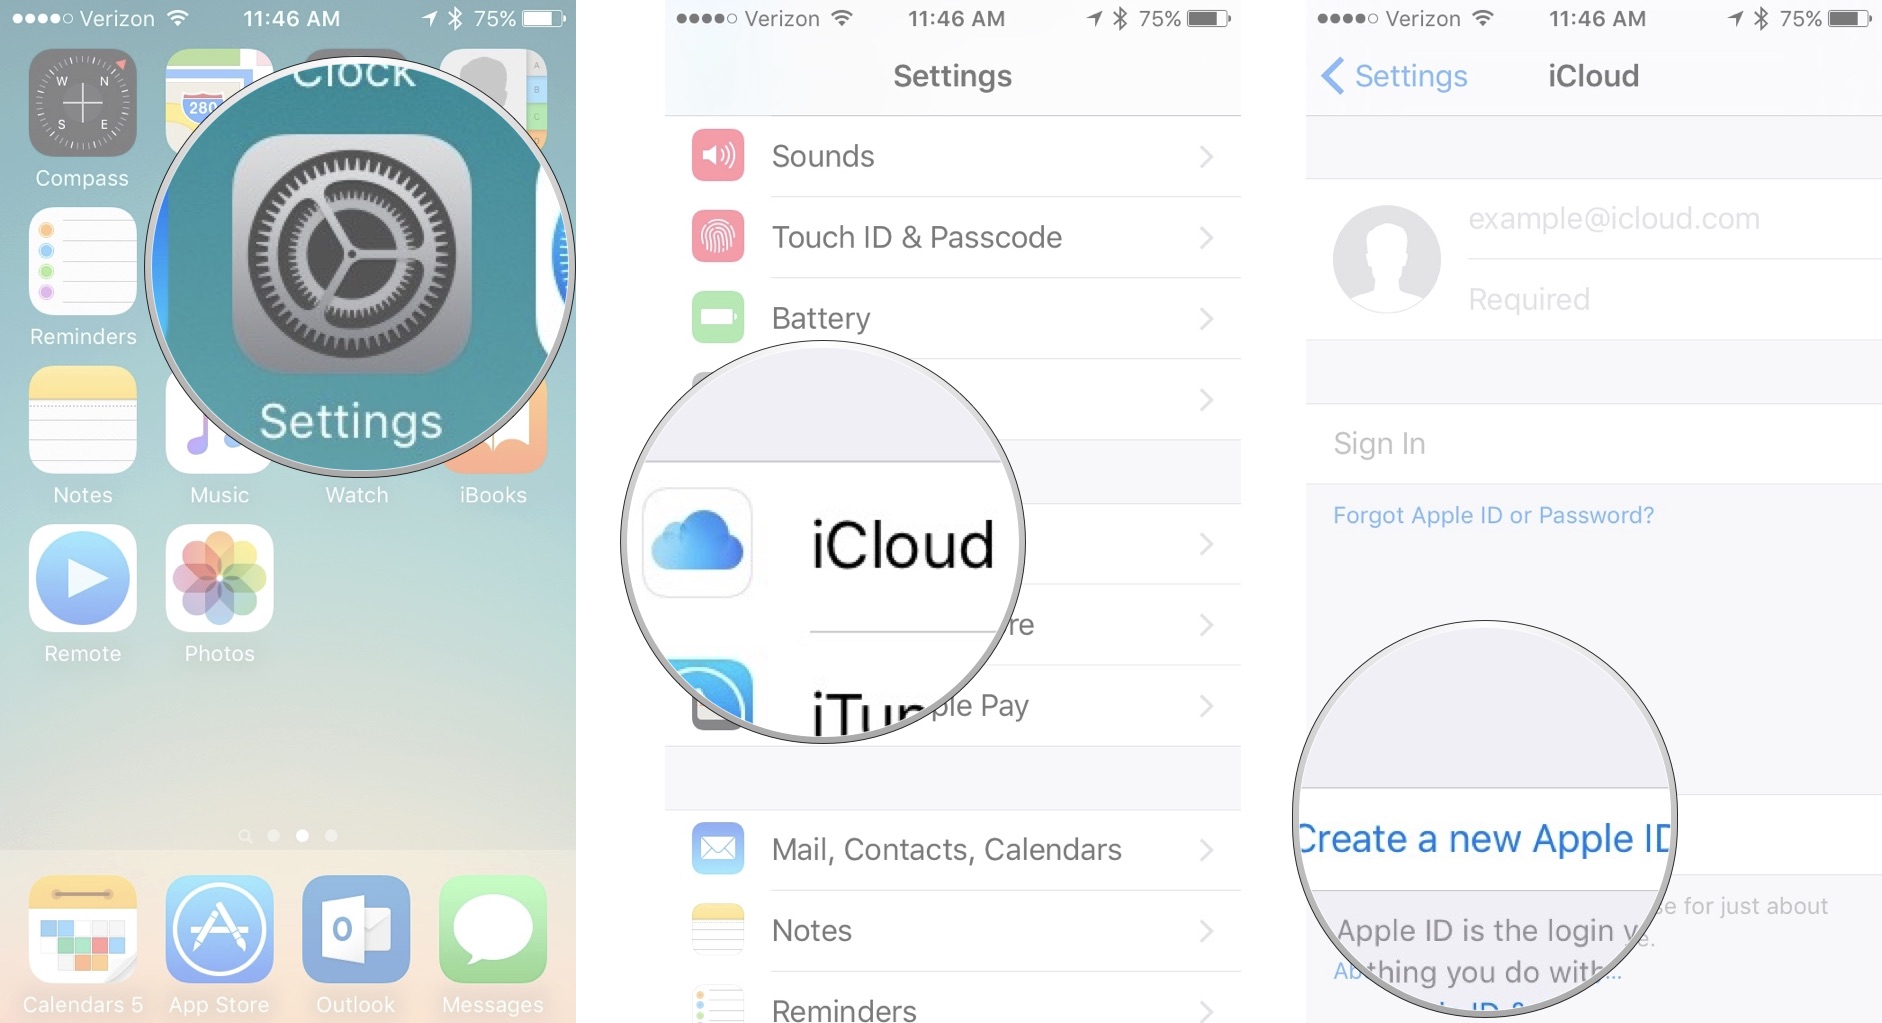
  1. Open the Settings app.
  2. Tap iCloud.
  3. Tap Create a new Apple ID.
    Creating a new Apple ID on iPhone
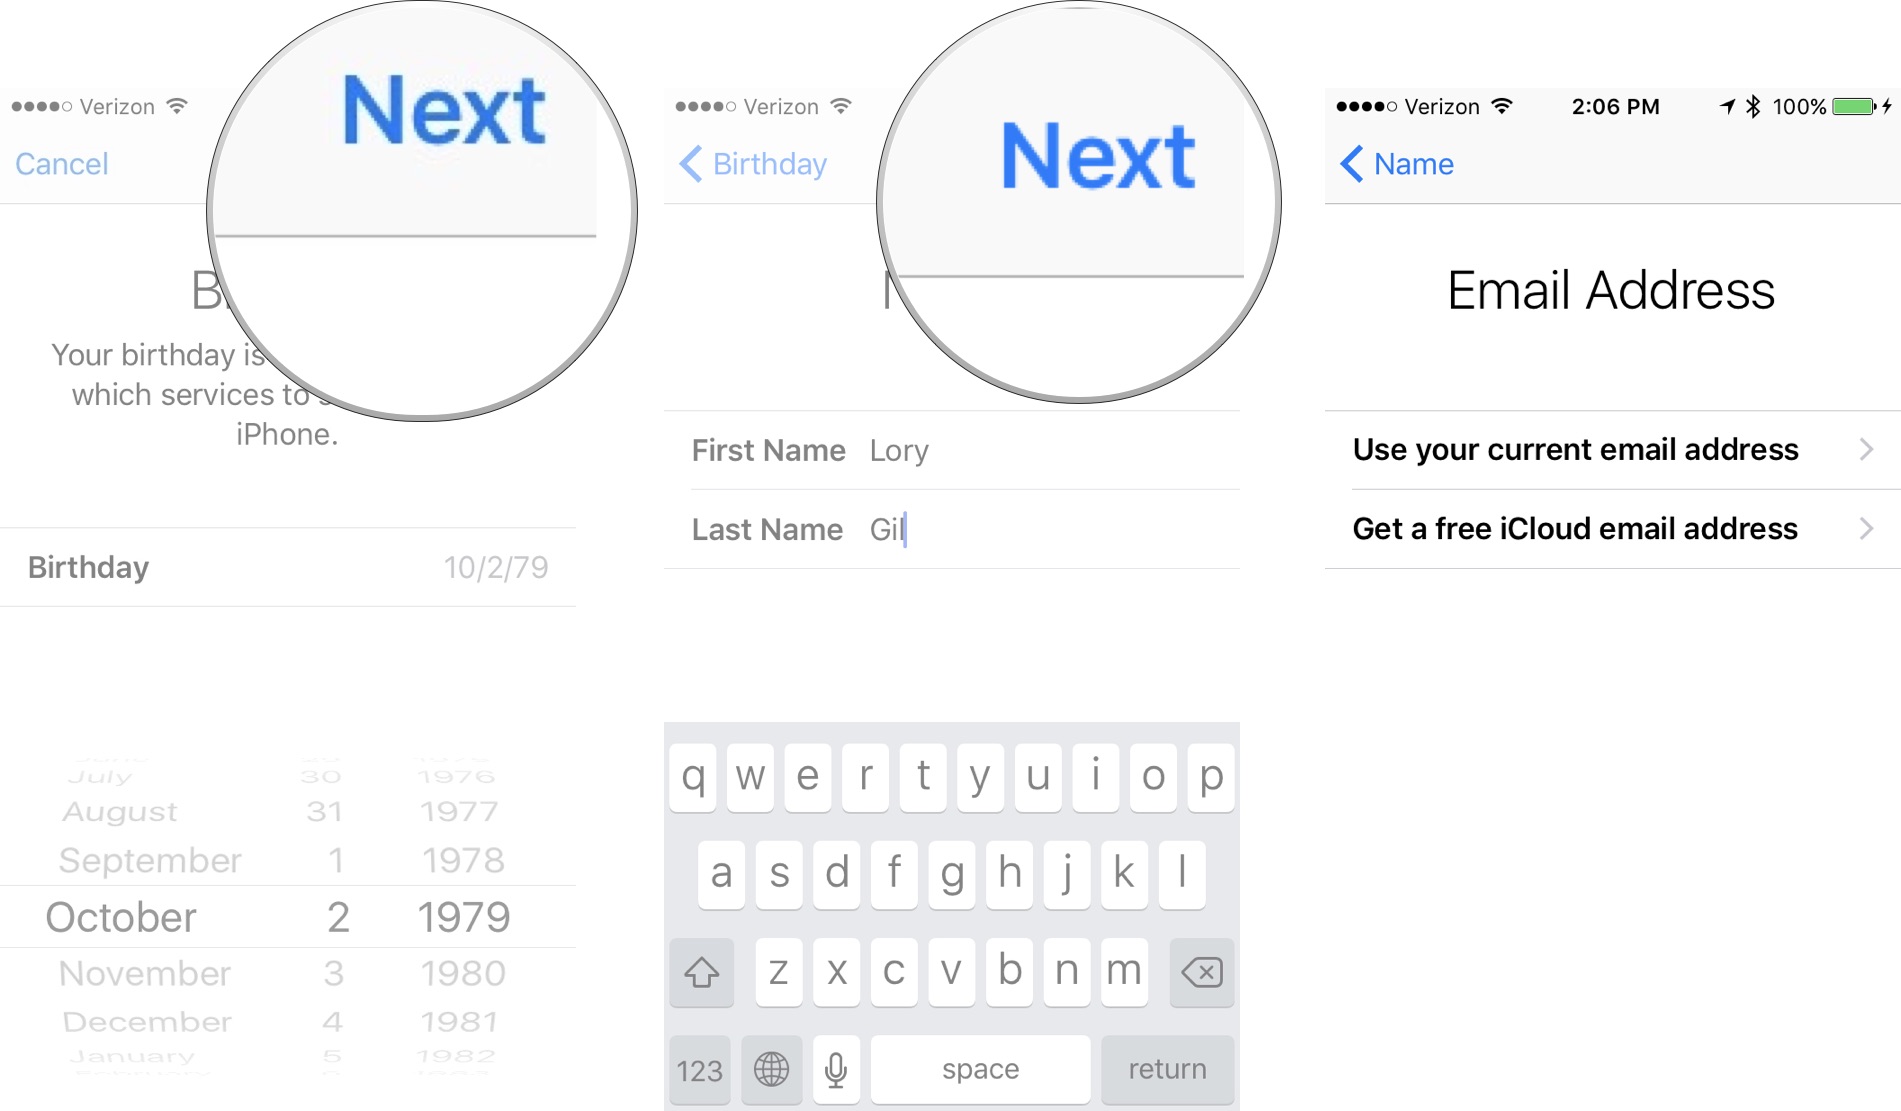
  4. Enter a birth date.
  5. Tap Next.
  6. Enter your first and last name.
  7. Tap Next.
  8. Select your current email address or get a new iCloud email address.
    Entering birthday for new Apple ID on iPhone
  9. Enter your email address.
  10. Create a password.
  11. Verify the password.
  12. Select a security question.
  13. Type in answer.
  14. Repeat two more times.
    Entering security questions for new Apple ID on iPhone
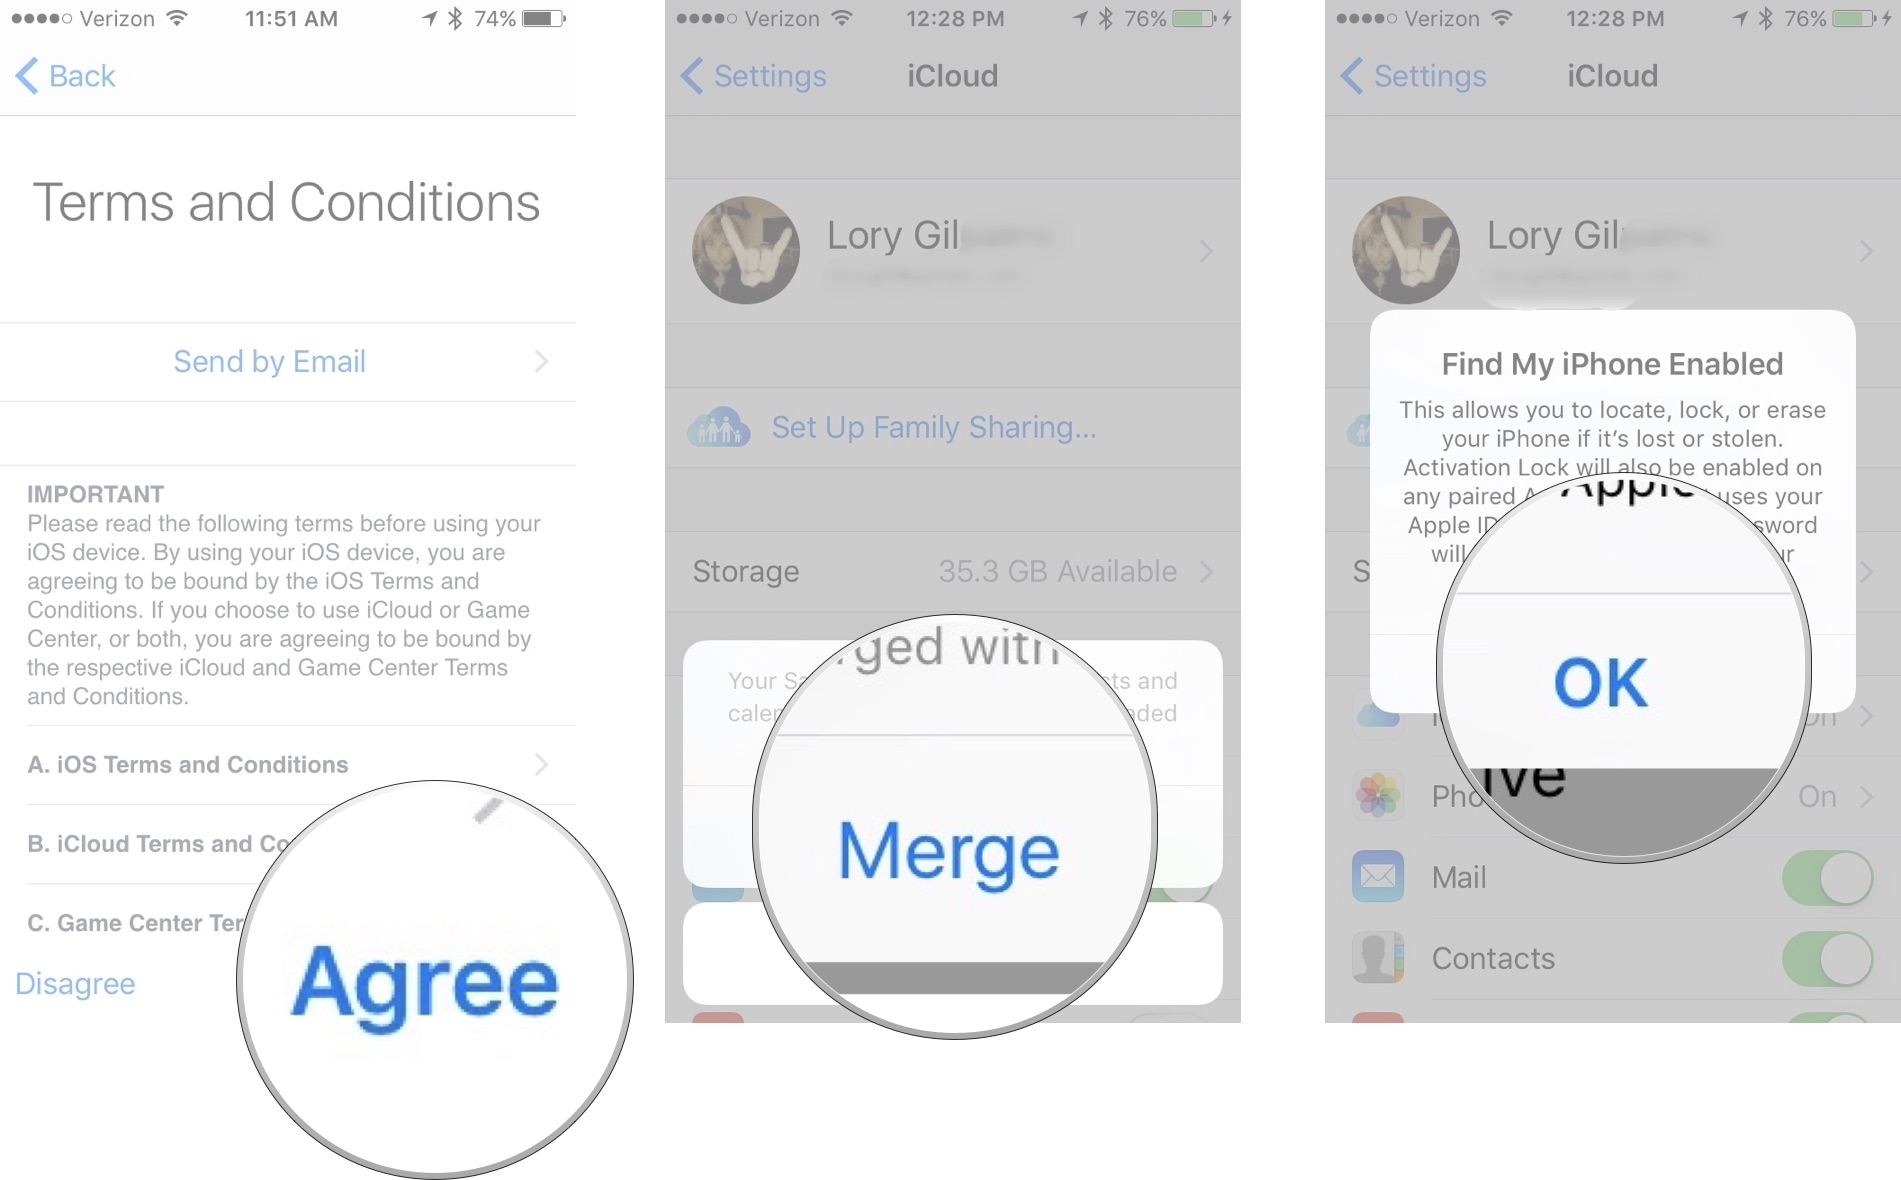
  15. Agree to the Terms and Conditions.
  16. Tap Merge or Don't Merge to sync iCloud data from Safari, reminders, contacts and calendars.
  17. Tap OK to confirm Find My iPhone is turned on.
    Merging iCloud with new Apple ID on iPhone

How to sign out of iCloud on your iPhone or iPad

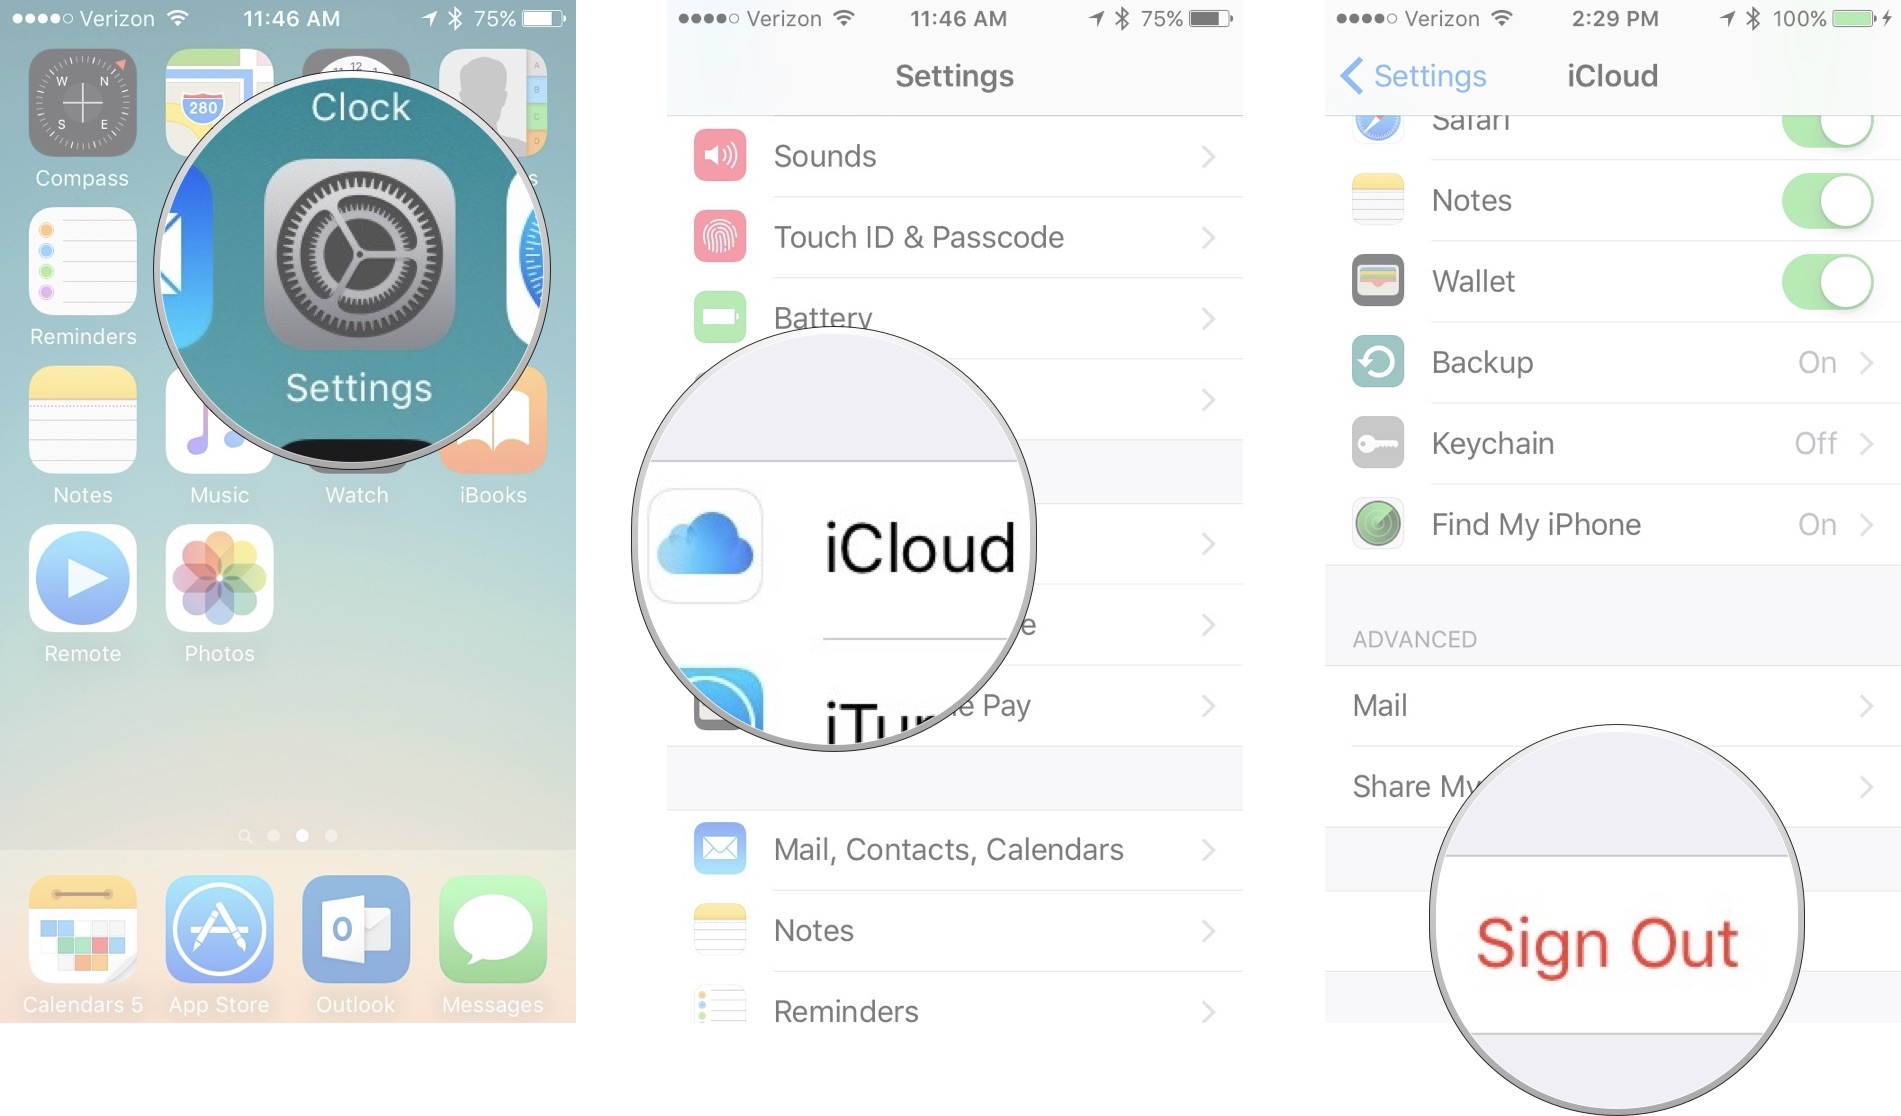
  1. Open the Settings app.
  2. Tap iCloud.
  3. Scroll down and tap Sign Out.
    Signing out of Apple ID on iPhone
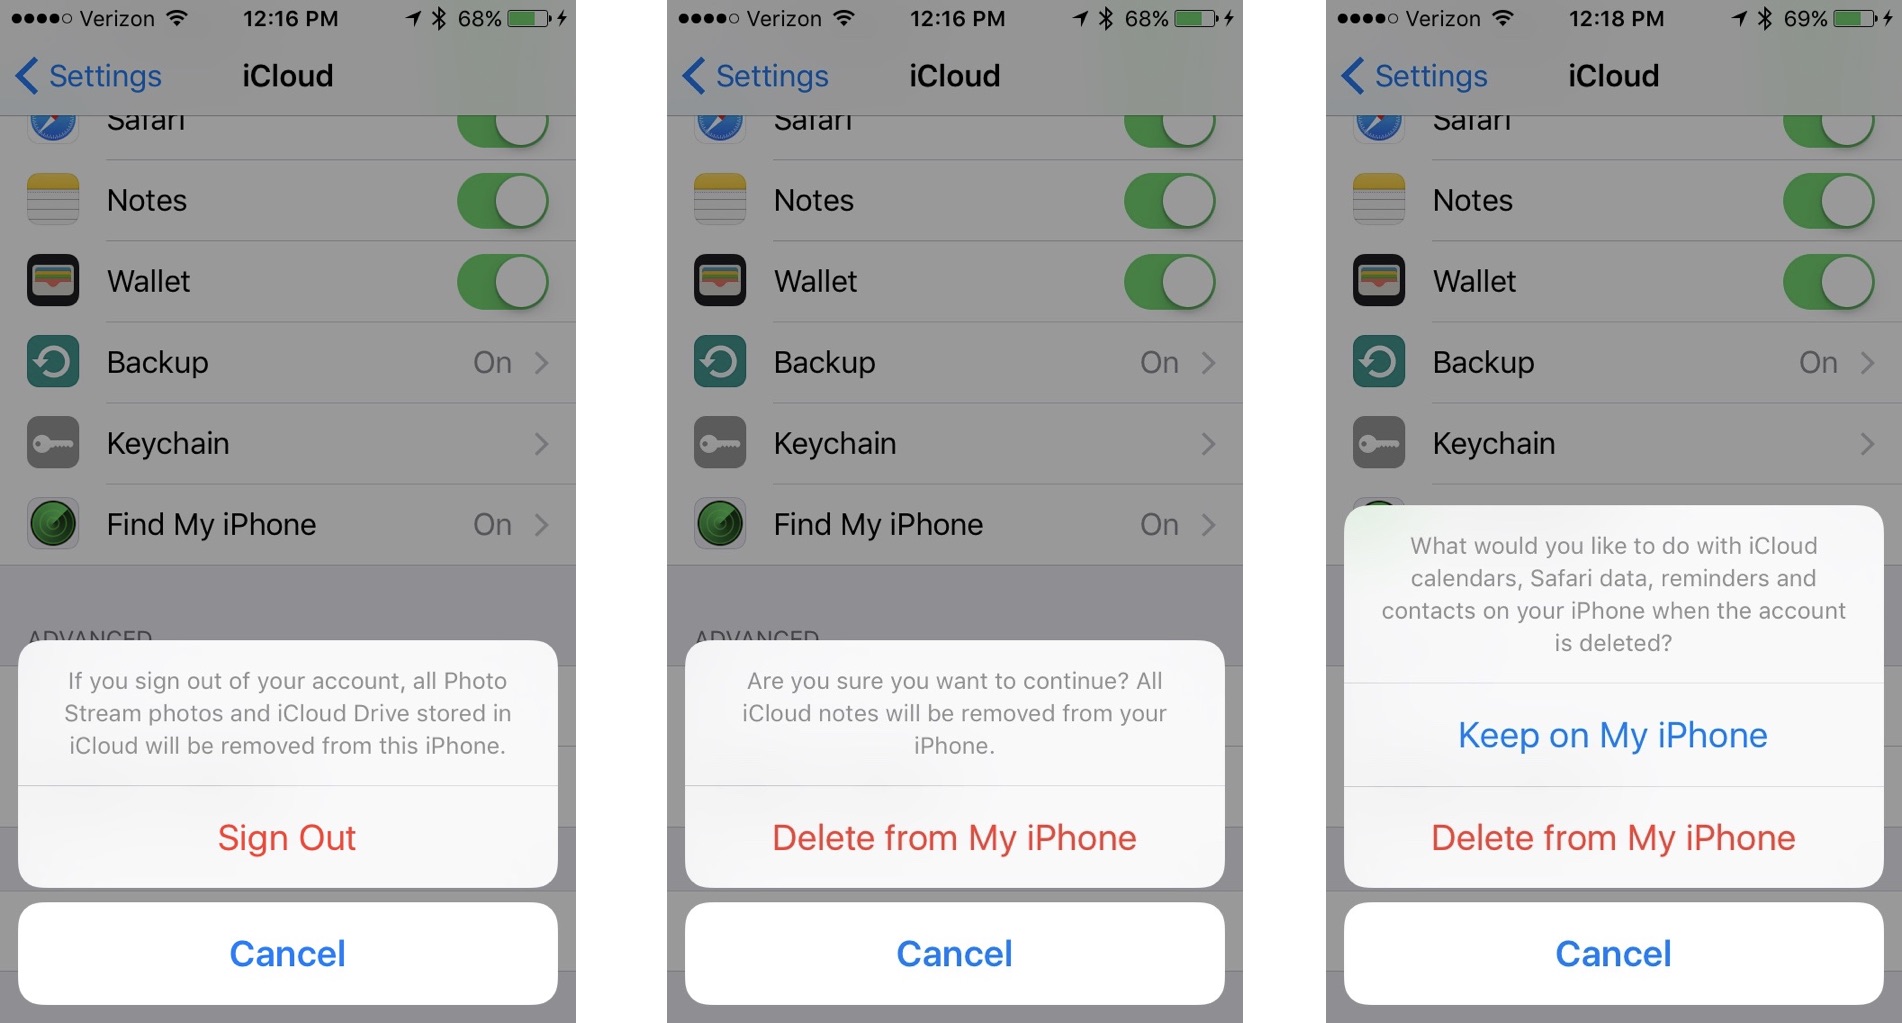
  4. Tap Sign Out to confirm that all Photo Stream photos and iCloud Drive content will be removed from this iPhone.
  5. Tap Delete from My iPhone to confirm that all Notes stored in iCloud will be removed from this iPhone.
  6. Select delete or keep iCloud calendars, Safari, reminders, and contacts on iPhone.
    Deleting iCloud from iPhone
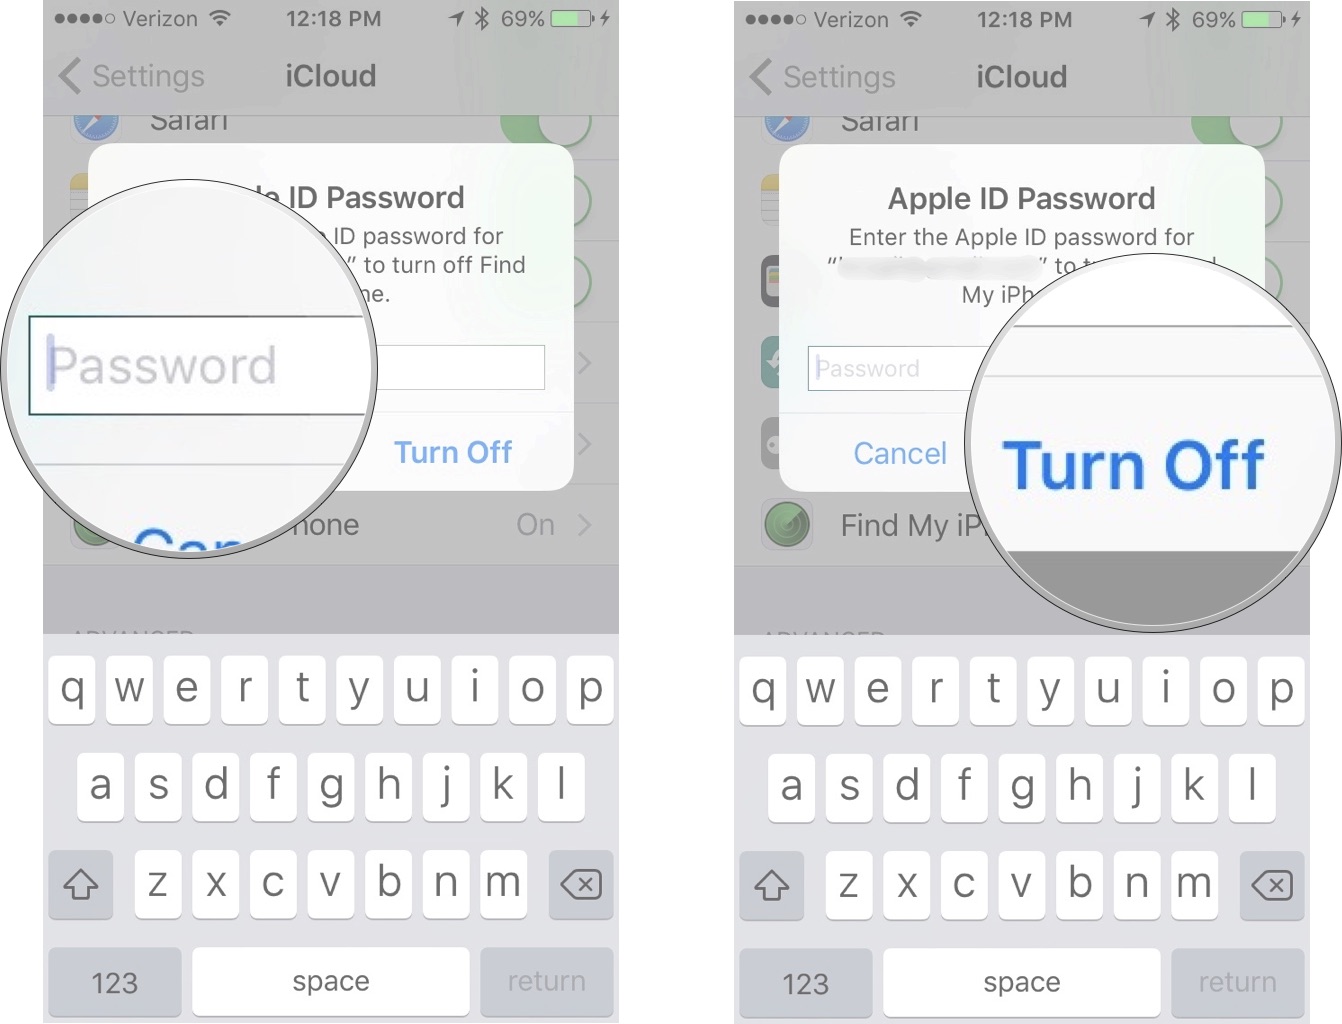
  7. enter password.
  8. Tap Turn off.
    Turn off iCloud on iPhone

How to sign in to iCloud with an existing Apple ID on your iPhone or iPad

  1. Open the Settings app.
  2. Tap iCloud.
  3. Enter the email address and password associated with your Apple ID.
  4. Tap Sign In.Signing in to Apple ID on iPhone
  5. Tap Merge or Don't Merge to sync iCloud data from Safari, reminders, contacts and calendars.
  6. Tap OK to confirm Find My iPhone is turned on.
    Merging content in iCloud on iPhone

Featured Post

All Answers of Quiz regarding to this course on Fiverr "Online Freelancing Essentials: Be A Successful Fiverr Seller"

To Clear All quiz of mentioned Course you can have a look on or check questions answers as well. Course name:  Online Freelancing Essentials...

Popular Posts