Sunday 20 November 2016

10 things every new Mac owner should know

Your new Mac is easy to set up and use. Make sure you know these important basics after you get started.
So, you've finally jumped ship and entered the Apple ecosystem. Welcome to the family! We Mac users love to share our knowledge, so please join the iMore forums if you have any questions. In the meantime, here are a few tips you should know about using your new Mac.

1. Set up a backup plan for your Mac

Time Machine on Mac
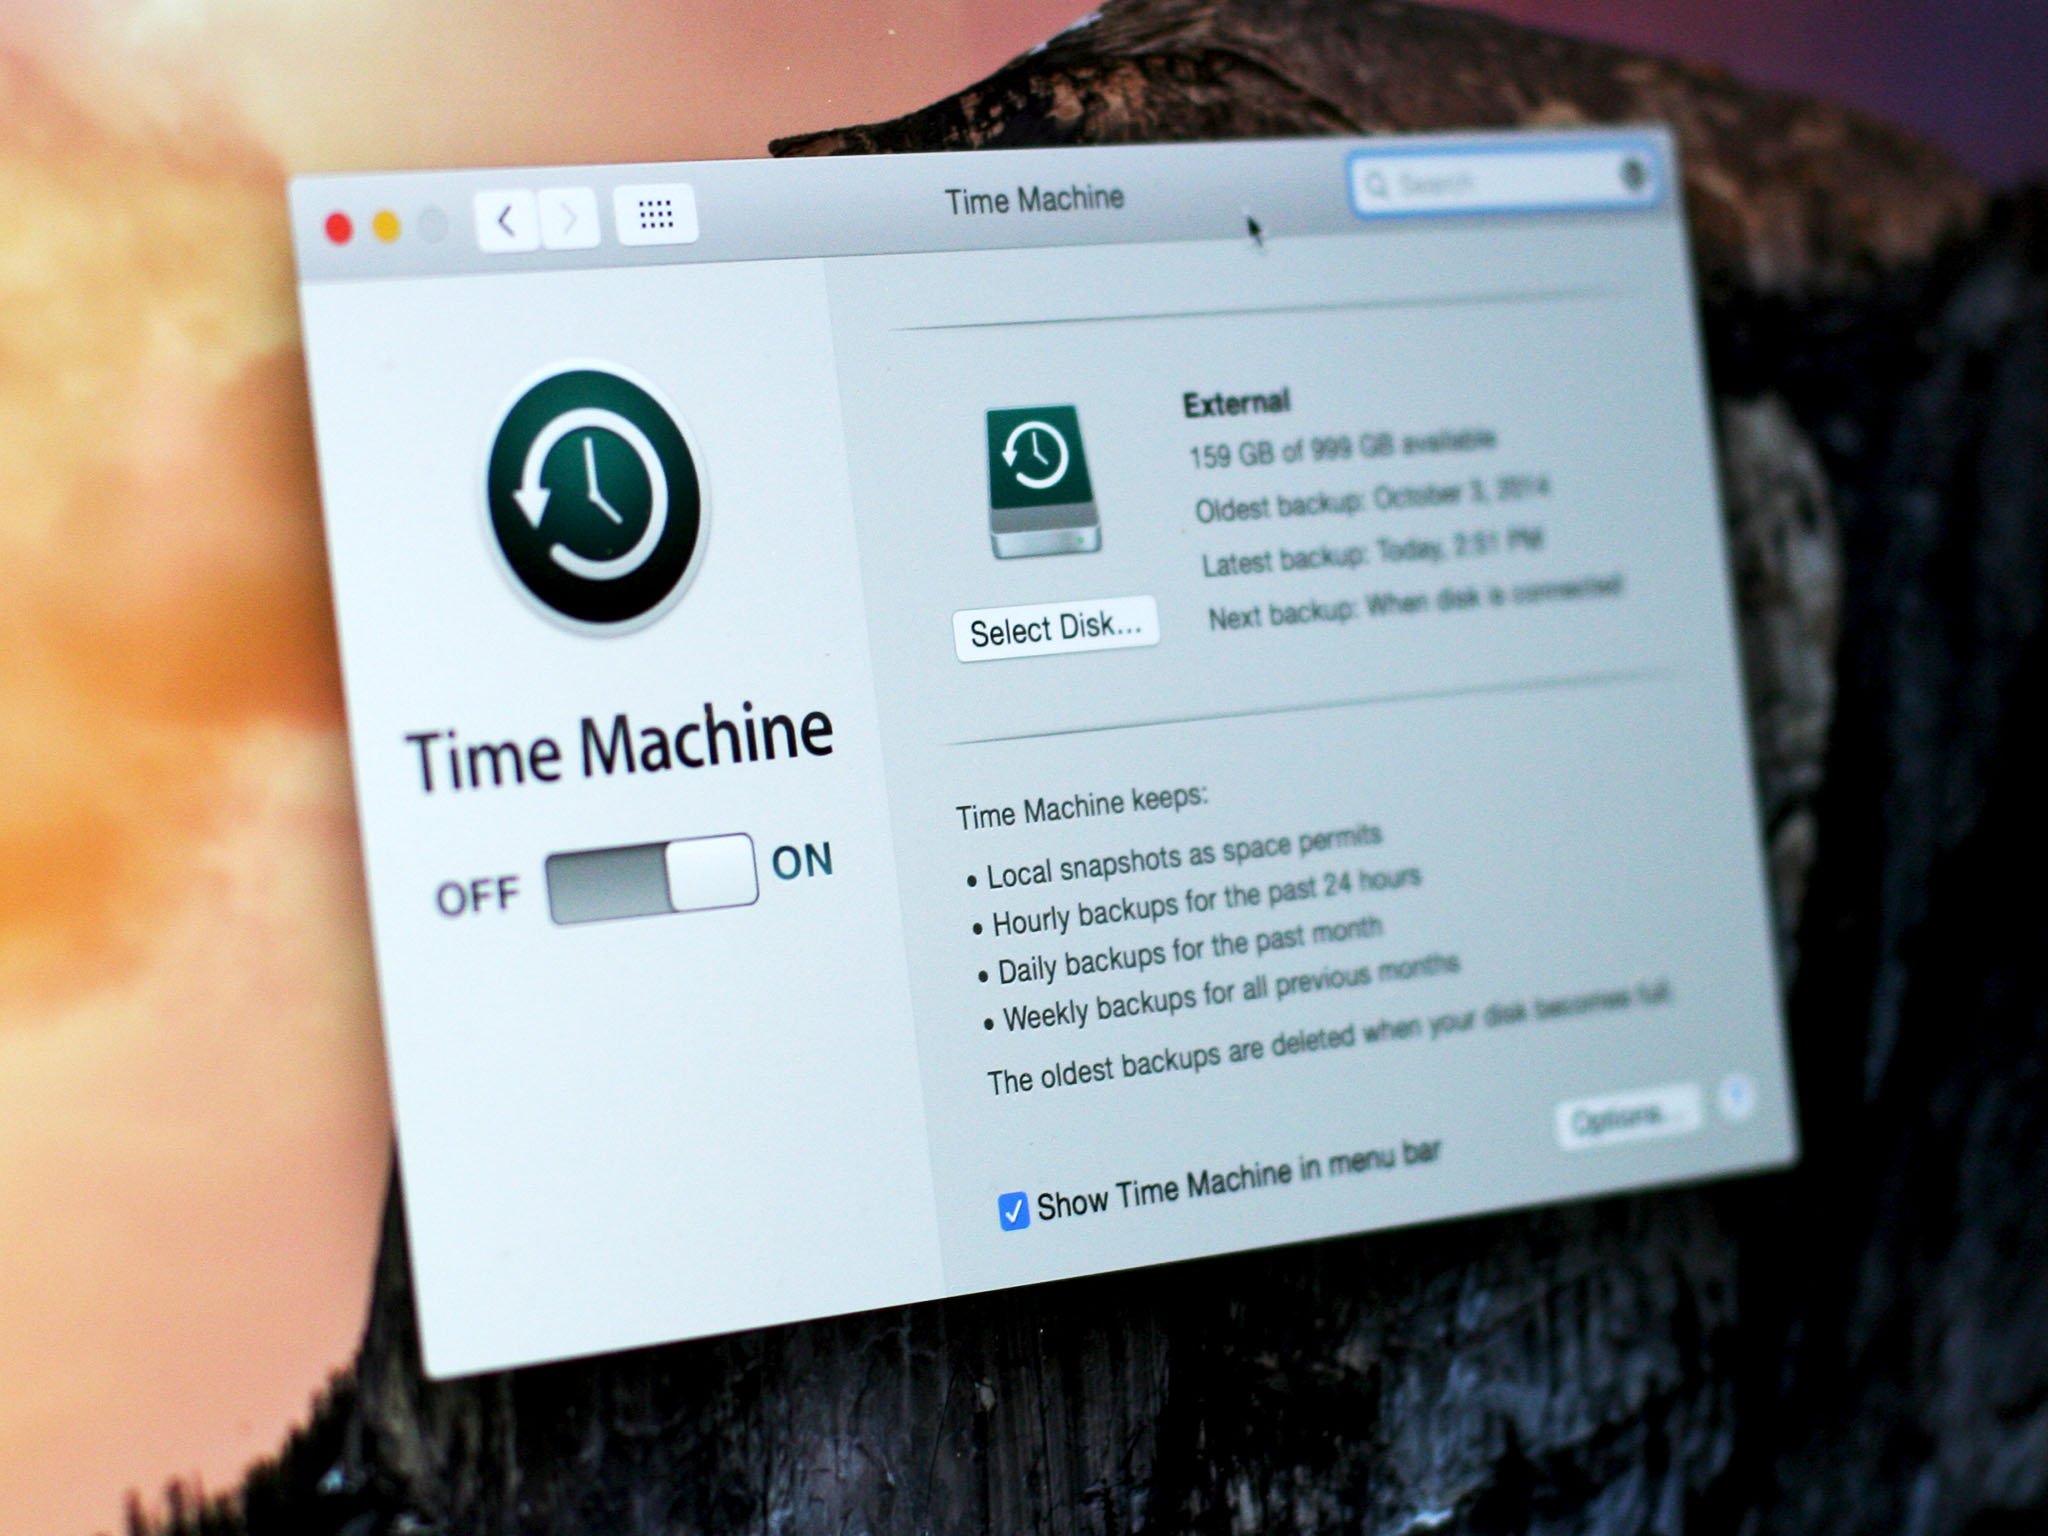
No matter how much you store in iCloud, you should always back up your Mac. Time Machine is the easiest method, but there are other plans that might work better for you. The choice is yours.
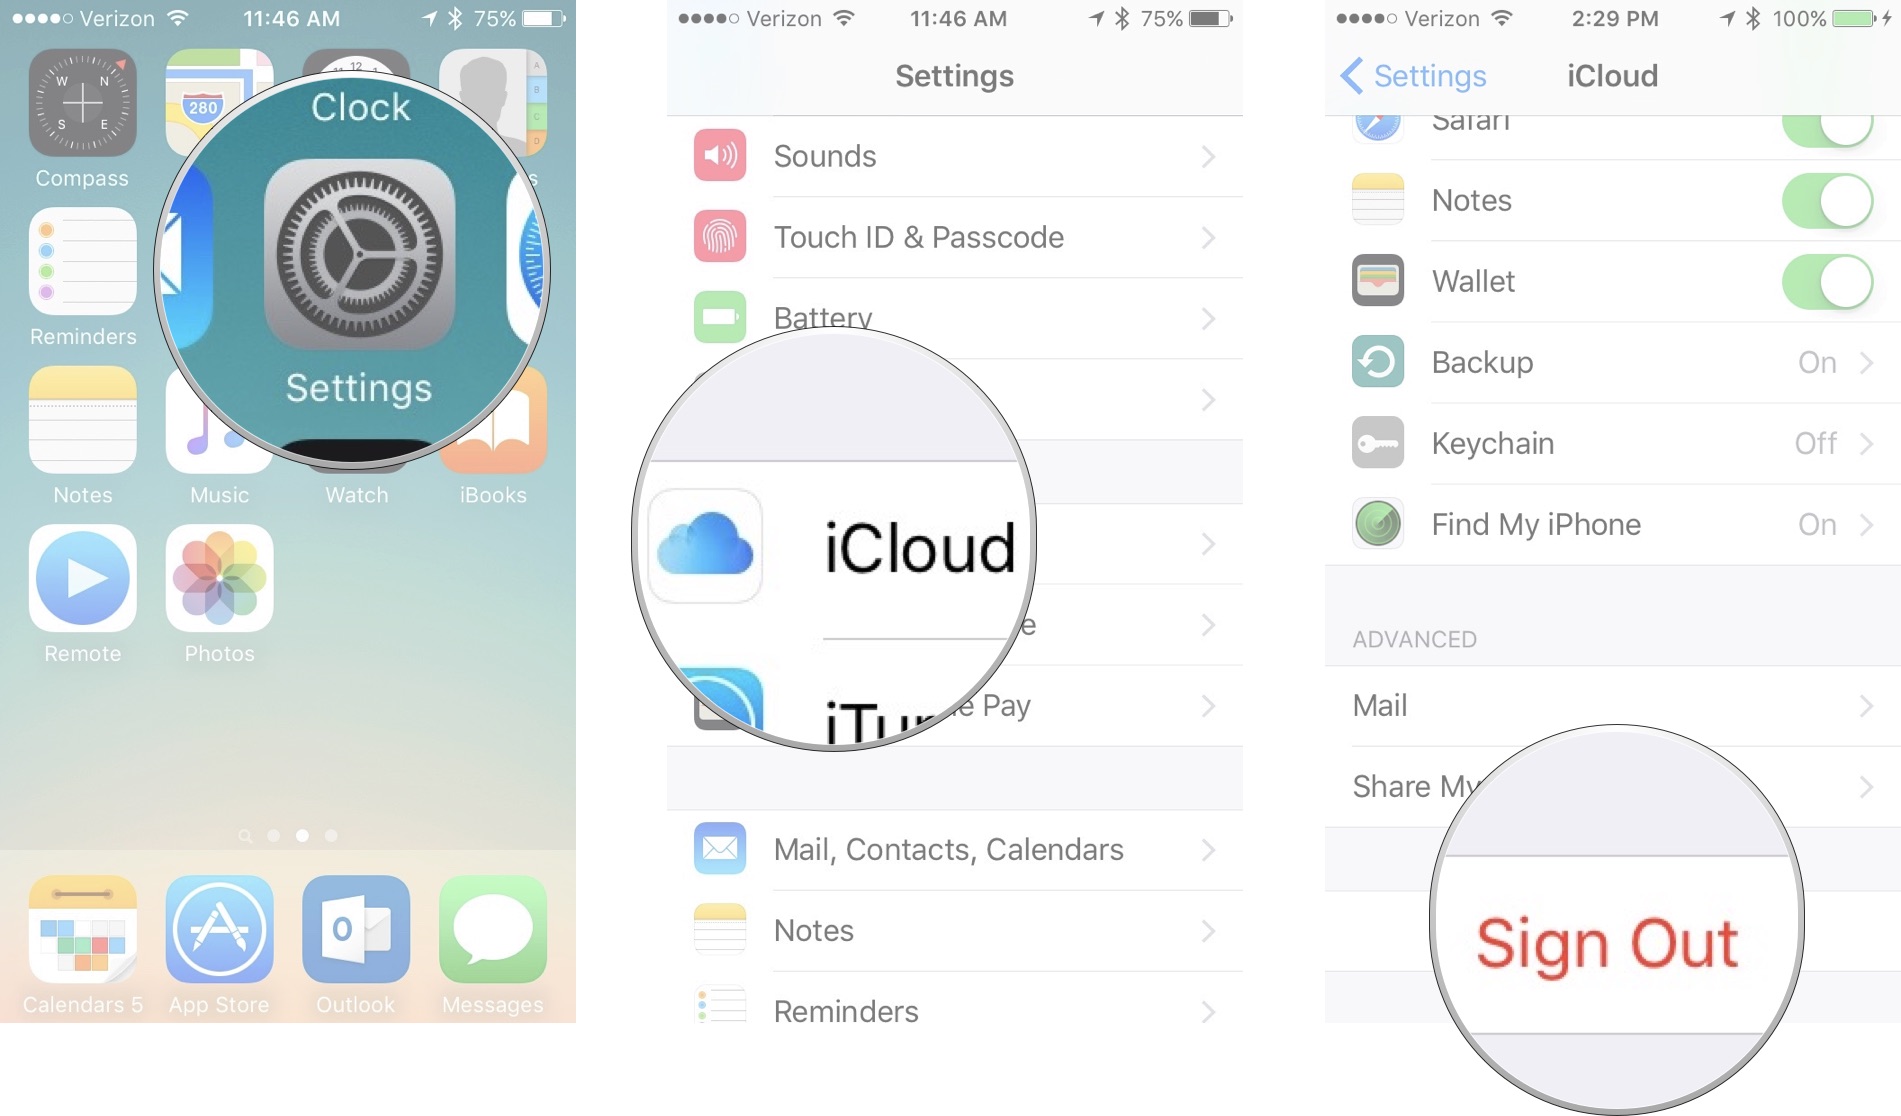
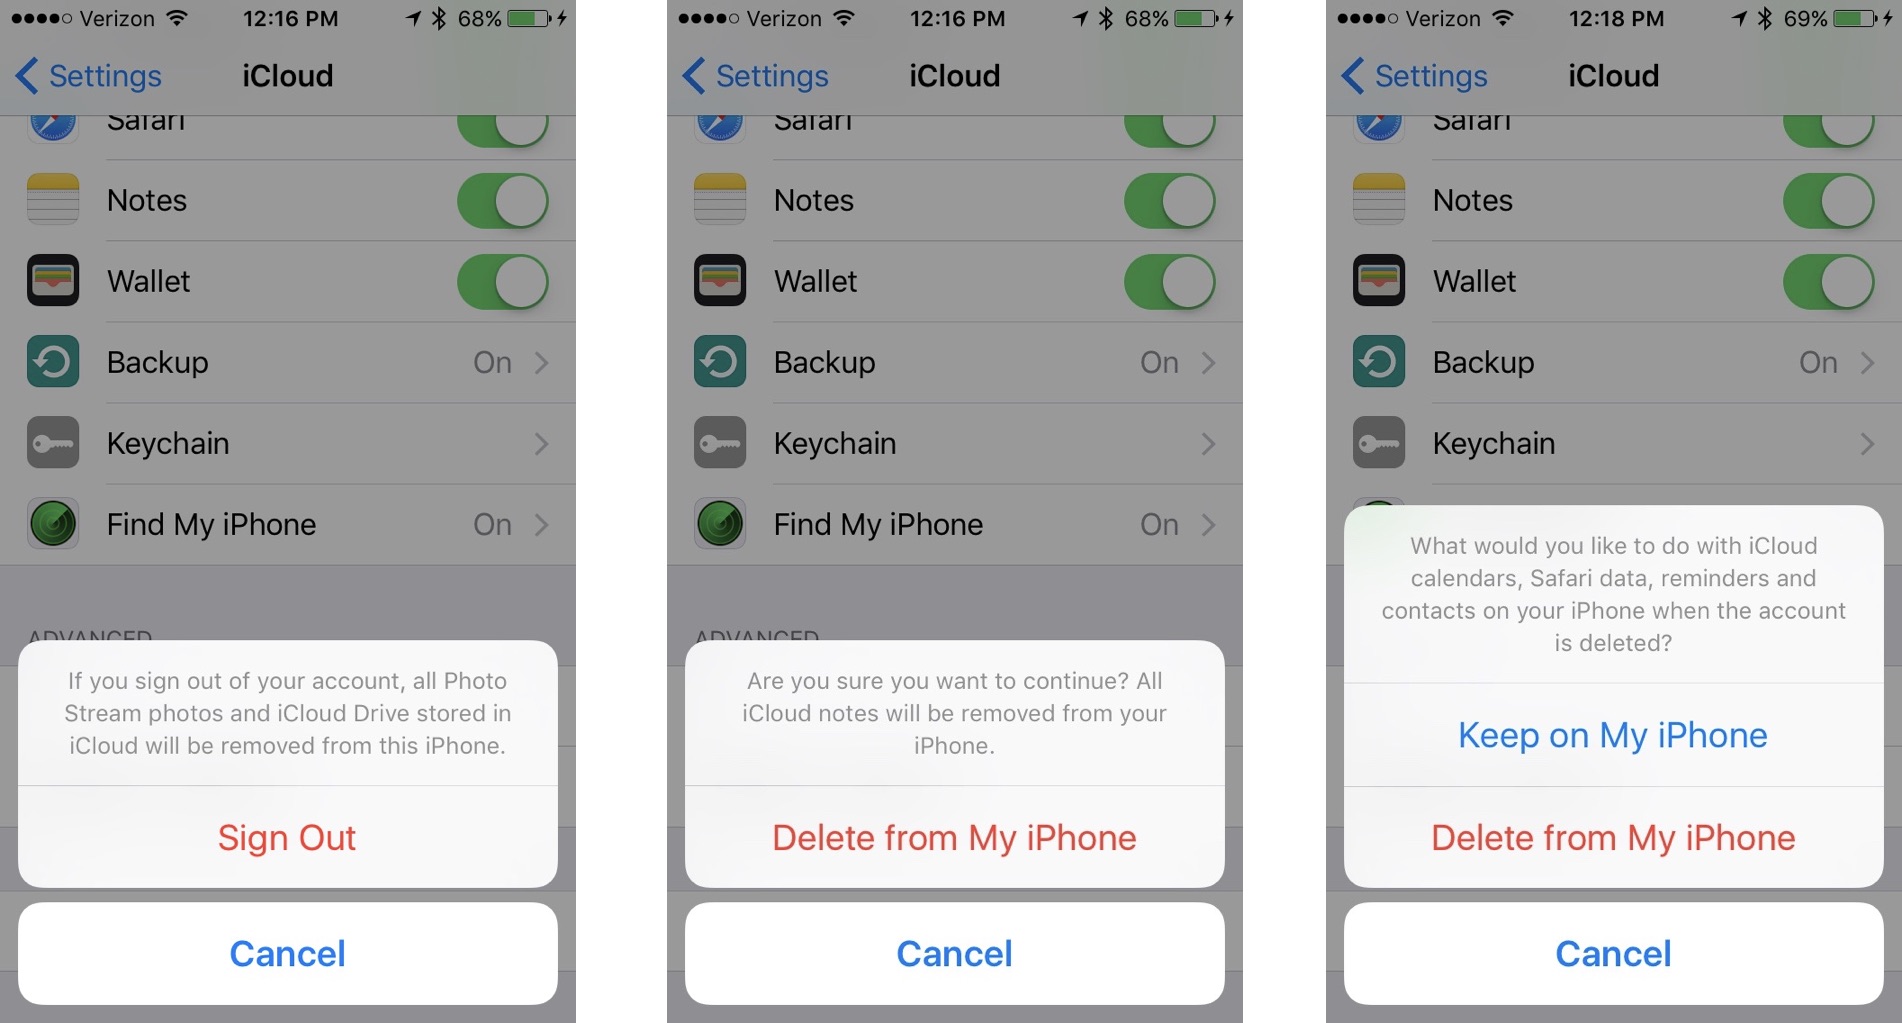
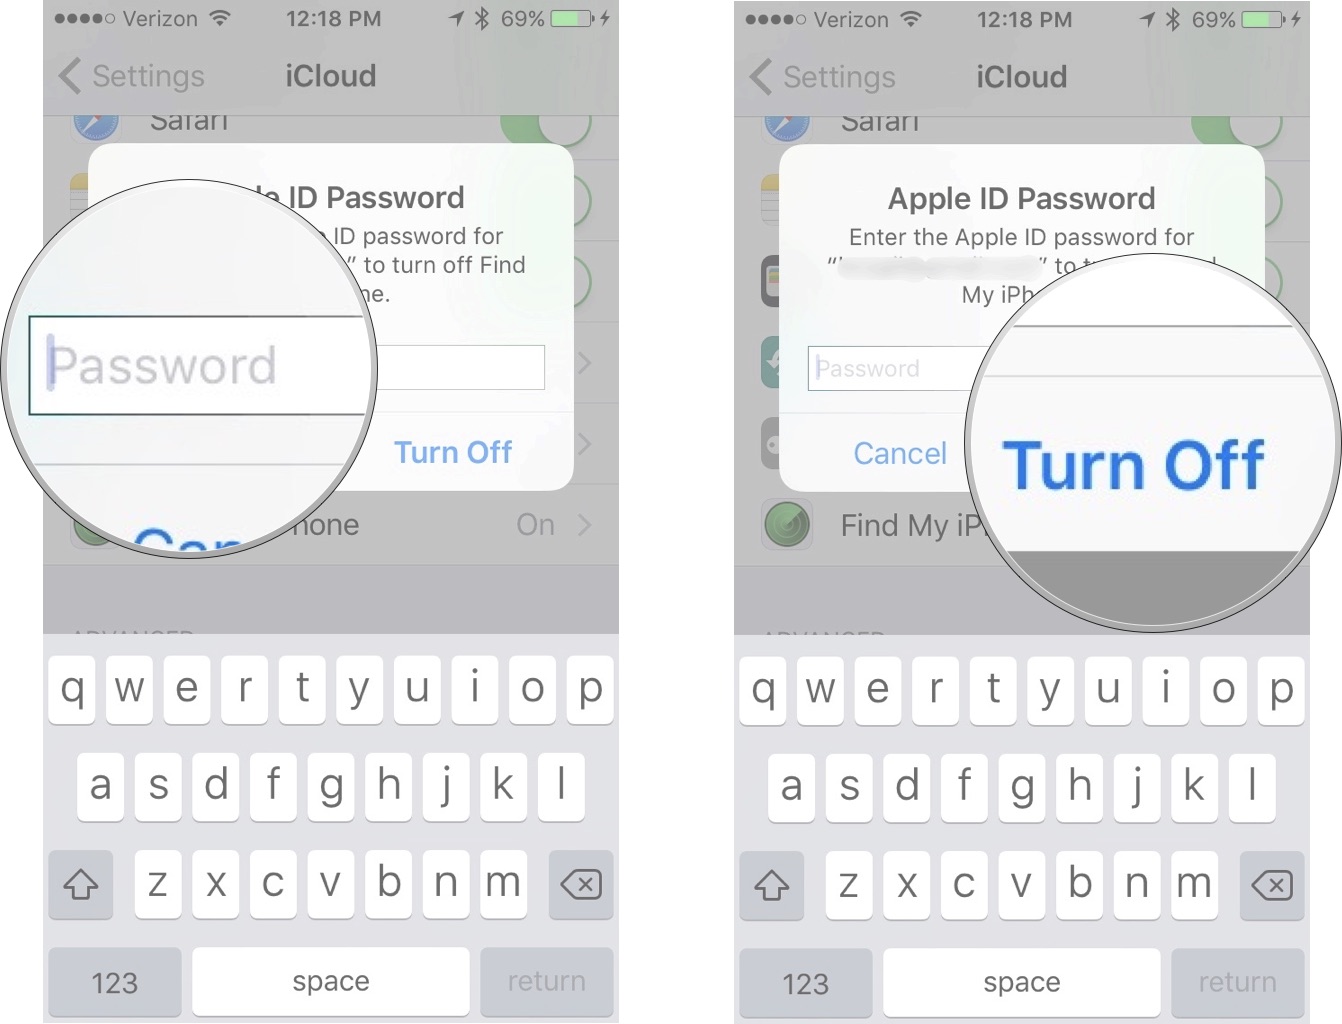
2. Sign into iCloud

iCloud on Mac
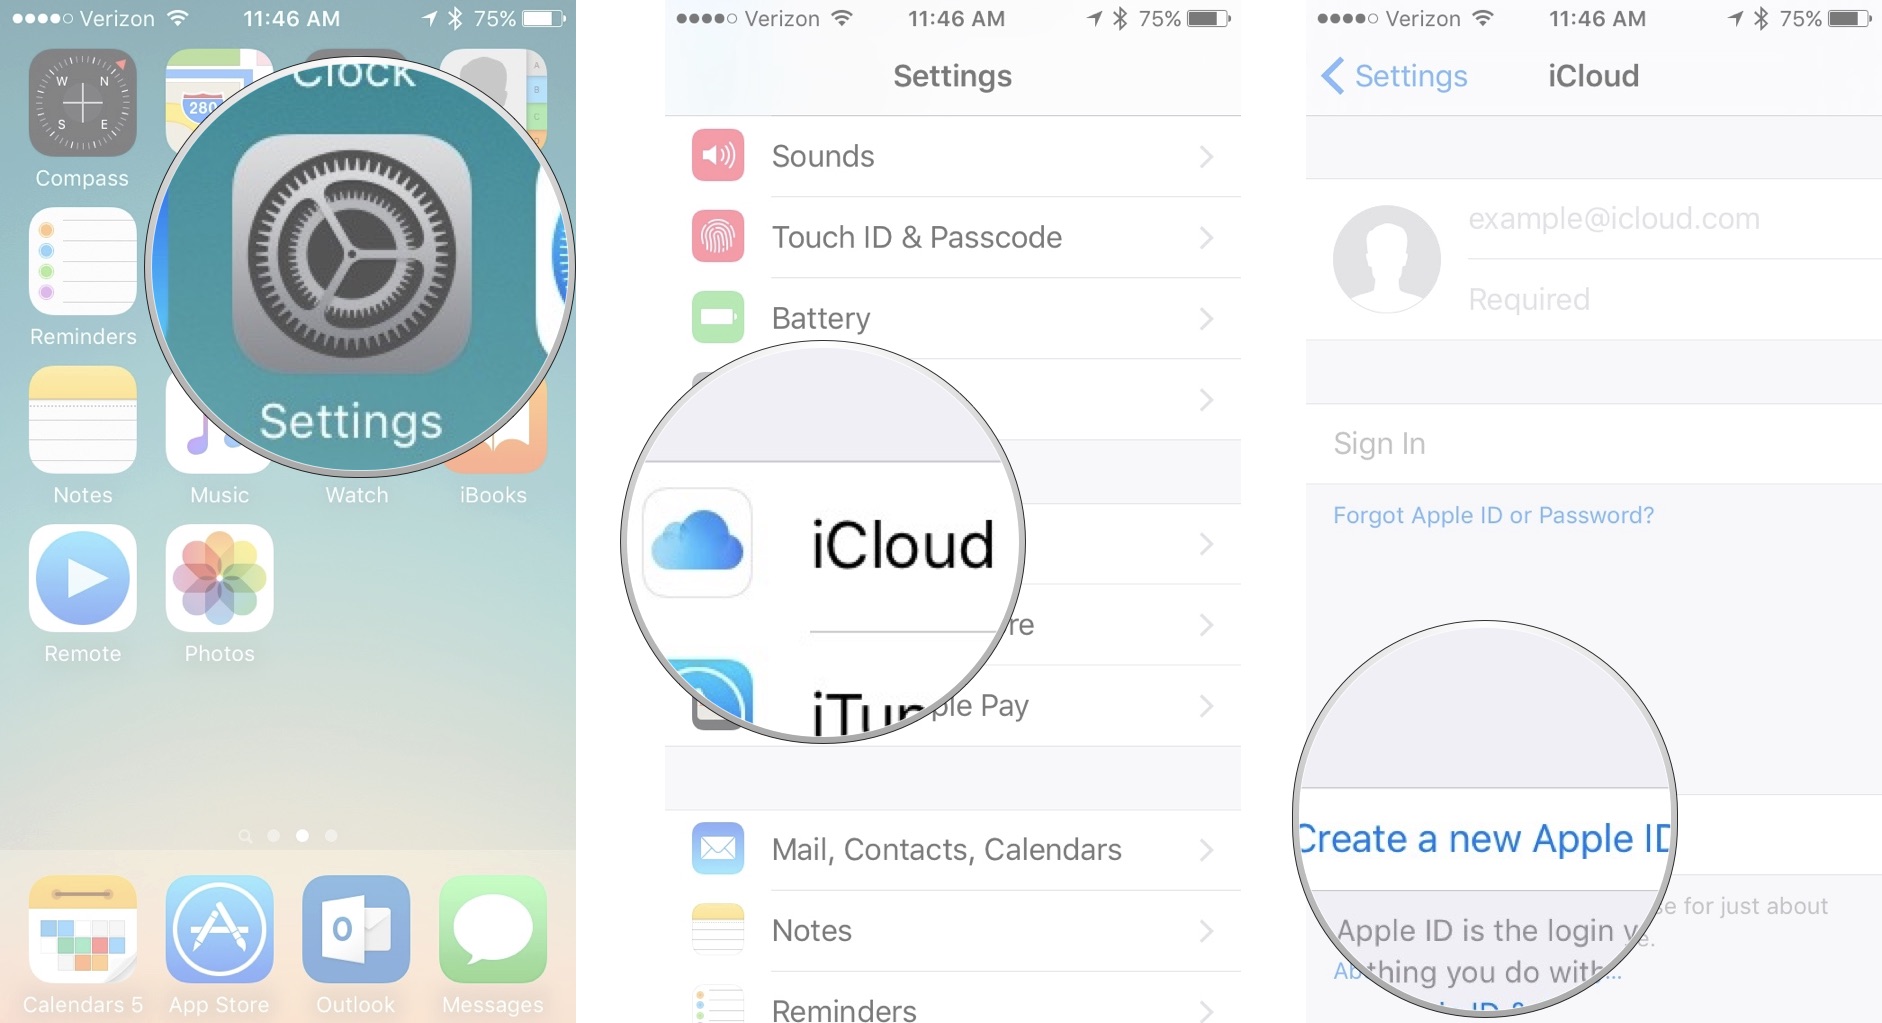
One of the best reasons to switch to Mac is the Apple ecosystem, which is largely fueled by iCloud syncing. You can access photos, documents, movies, music, and more, all with your iCloud account. So, make sure you are signed in to iCloud using the Apple ID you use to sync your iOS, tvOS, and watchOS data.

3. Sign into iTunes

iTunes on Mac
iTunes is installed on your new Mac when you get started. If, for some reason, you don't have the iTunes app, you can manually download it from Apple. iTunes is where you store all of your movies, tv shows, iBooks, apps, music, and more. Even if you don't keep your media on your Mac, you can download purchased content right from iTunes.
Advertisement

4. Set up Email and Calendar

Calendars apps on Mac
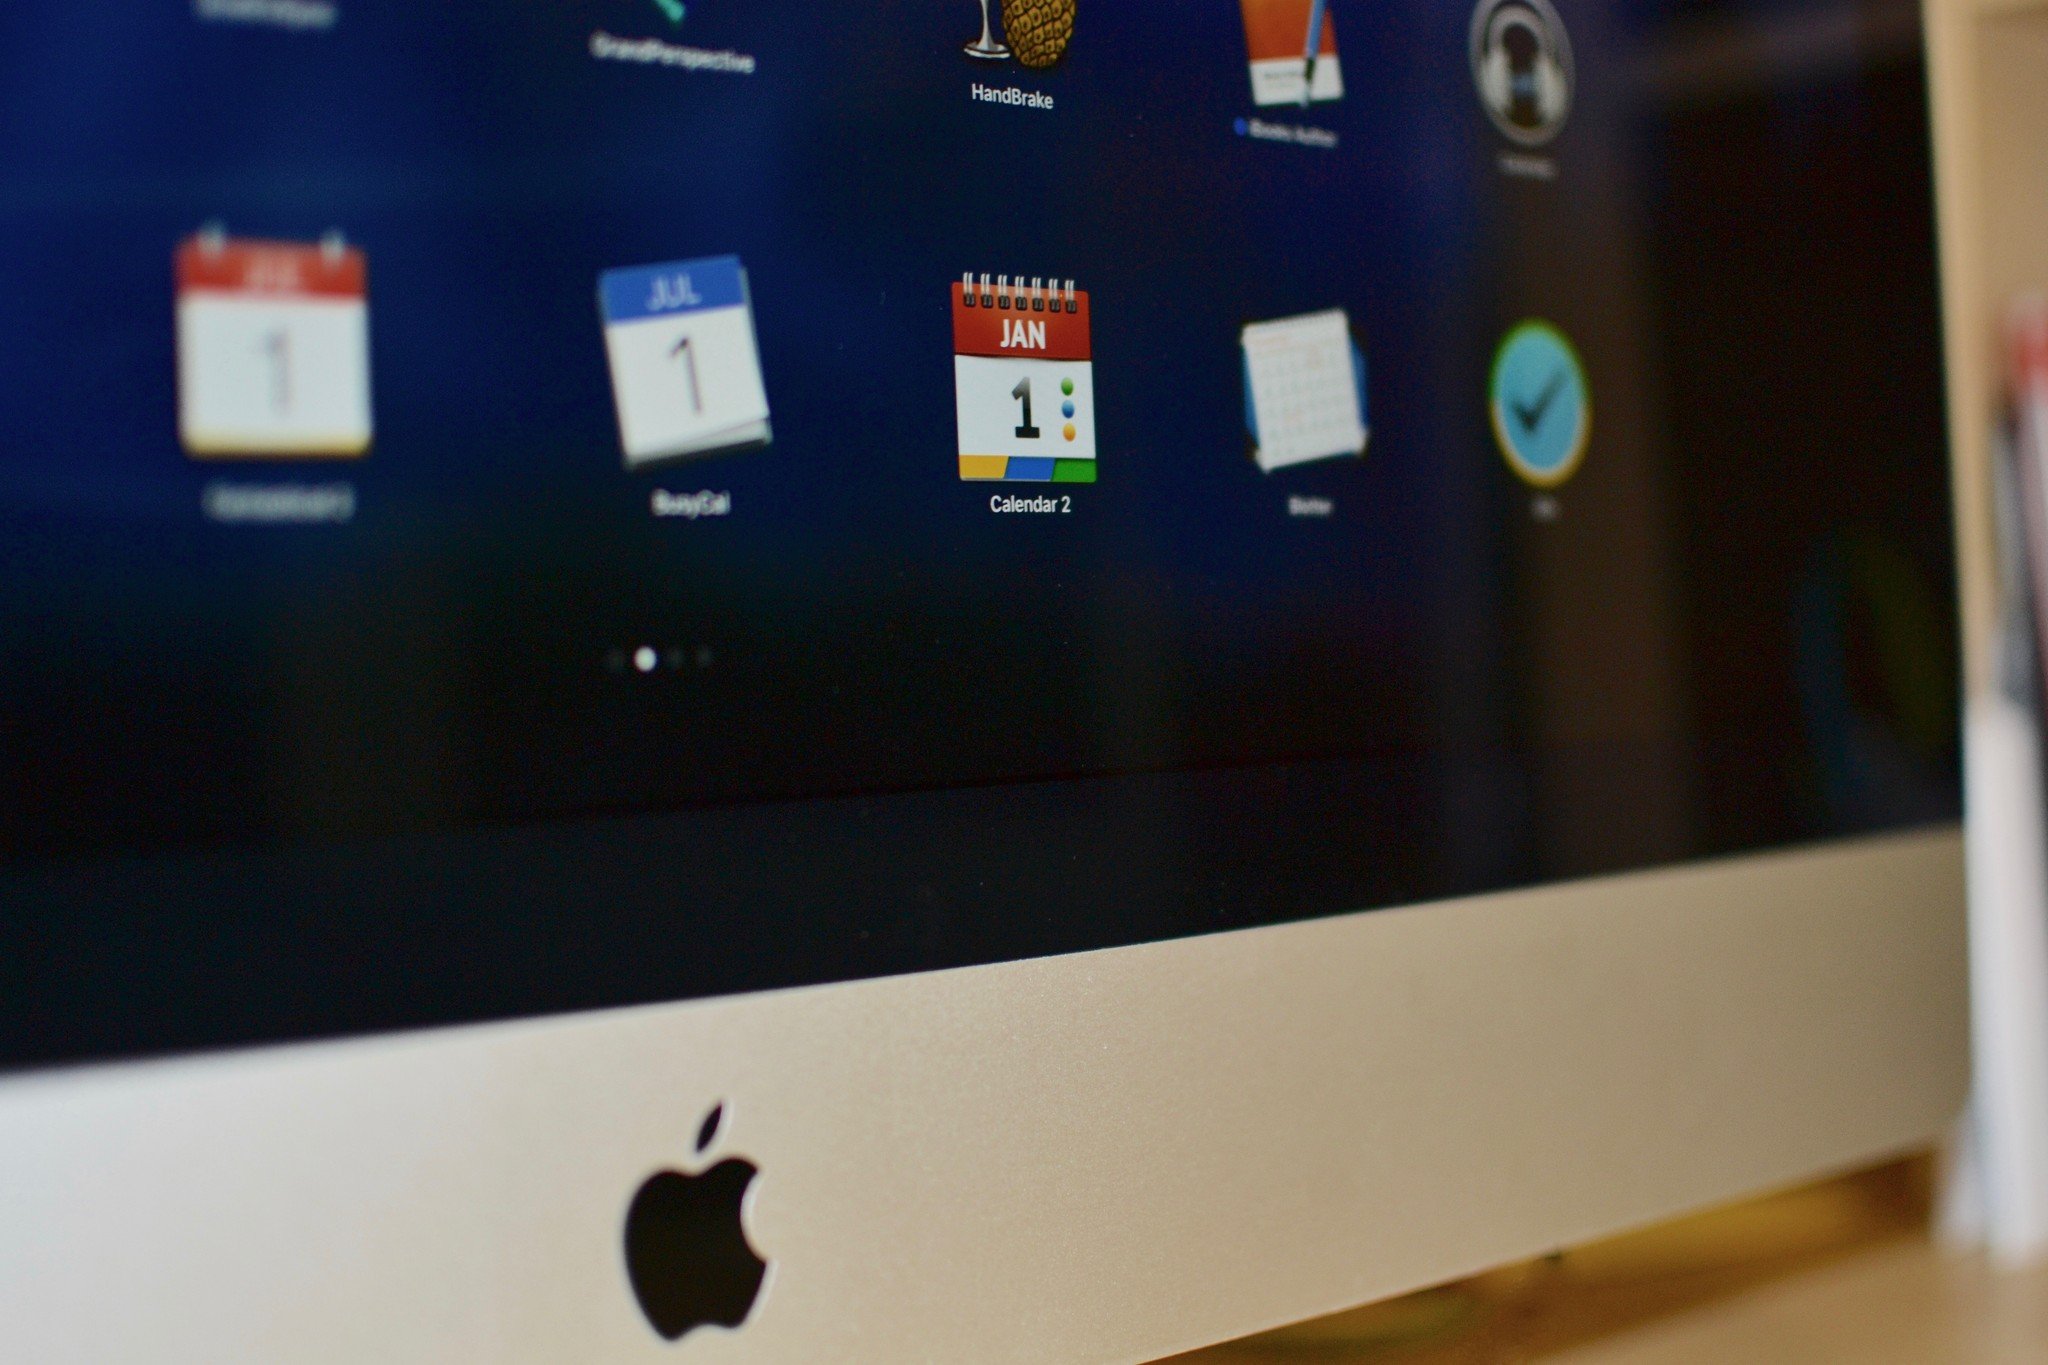
Although there are a number of fantastic email and calendar apps for the Mac, you should still set up the built-in Mail and Calendar apps on your Mac. Partly because some apps use them as a jumping off point for syncing data (mostly just iCal, actually), and partly because you never know when your favorite third-party app will stop working. The built-in Mail and Calendar apps will most likely always be supported by Apple.

5. Set up Optimized Storage

Optimized Storage on Mac
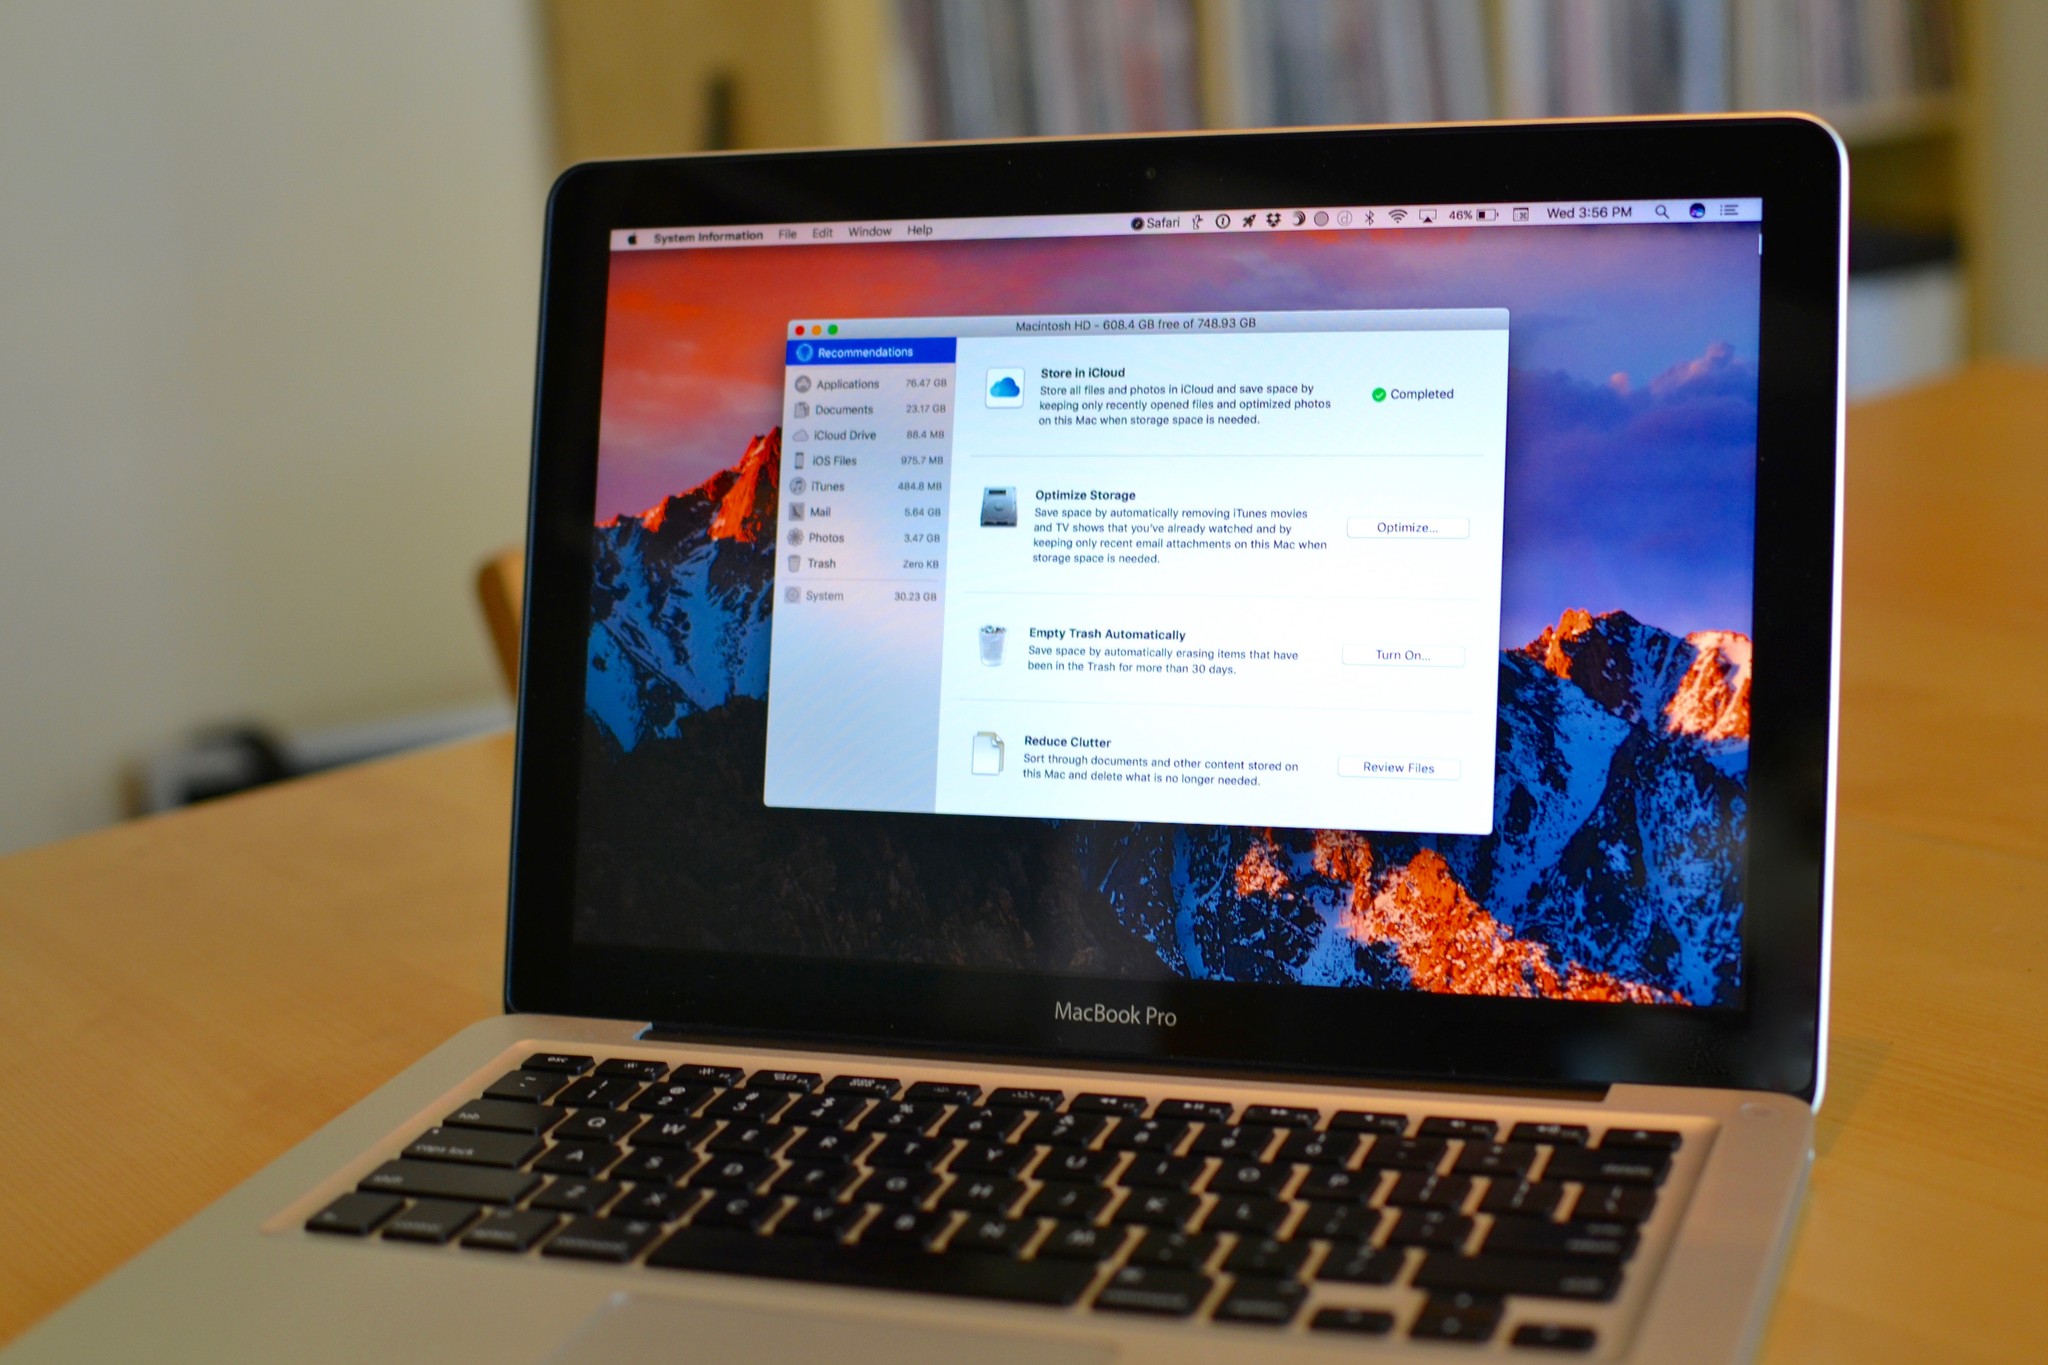
Apple has developed a great way for you to keep your Mac's hard drive from getting too full. Using a number of iCloud syncing options, as well as a healthy clutter cleaning regimen, you can keep your hard drive free for more important downloads.

6. Set up automatic downloads

MacBook
Apple regularly updates macOS with new and awesome features. Some Mac app developers also like to keep things ticking with regular updates. You can ensure you don't miss anything by setting up automatic downloads, which will run in the background.

7. Connect your printer

AirPrint
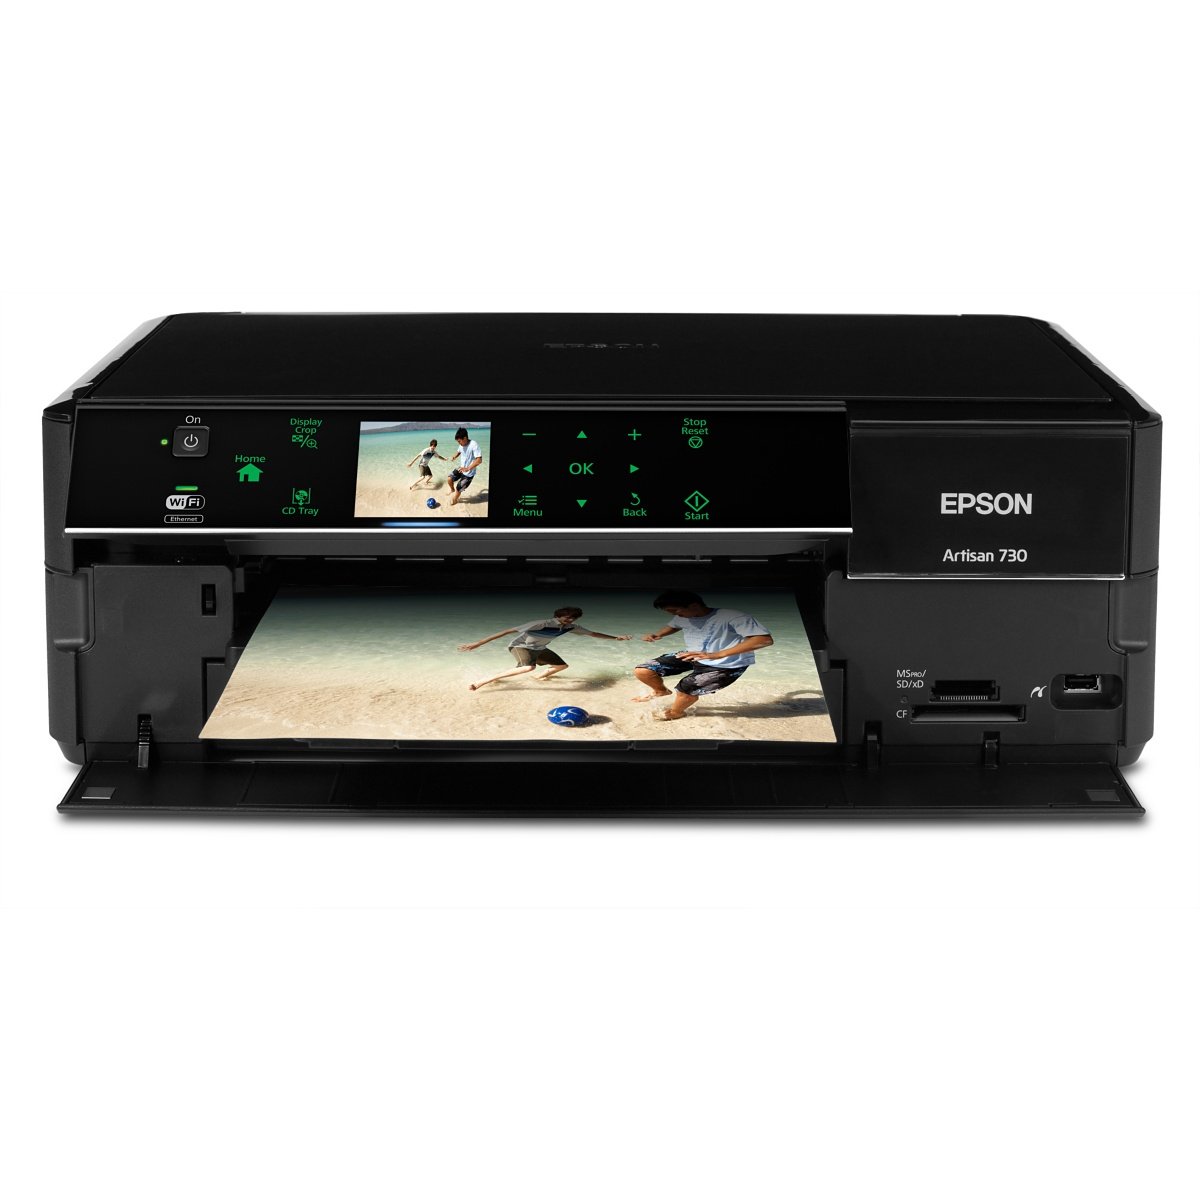
Peripherals like a keyboard, trackpad, and mouse are all important to getting the most out of your Mac, but you should also think about setting up a printer. Even if you don't need it now, you will probably need one at some point, and you don't want to be rushing around at the last minute.

8. Download apps and games

Mac App Store
As much as Apple gives you plenty of programs to help get you started on your Mac, there are still plenty of apps you will need for productivity, entertainment, and more. That's where the Mac App Store comes in. You can find almost every type of app in the Mac App Store. Once you download an app, it is available on all other Macs synced with your Apple ID for as long as the app is in the Mac App Store.

9. Integrate your social media

Twitter on Mac
When you sign into Facebook and Twitter on your Mac, you will be able to take advantage of systemwide integration without even needing a separate app. You can have Siri update your Facebook status or see Twitter alerts in Notification Center. You can tweet pictures and share videos on Facebook. To sign in to Facebook and Twitter, open System Preferences > Users & Groups, and select your social networking account. Sign in with your user name and password to get started.

10. Get to know Spotlight

Spotlight on Mac
Spotlight is your go-to program for finding practically everything you need on your Mac or on the Web. You can look up directions using Maps, open a Terminal window, find utilities you didn't know you had, and more. All you have to do is click on the search icon in the upper right corner of your Mac's screen and type in a word or phrase. Spotlight will search through all of your files, folders, emails, and documents to find the right content. If that's not enough, Spotlight will also search through your entire computer system, and even looks stuff up on the web.

How does Touch ID work? and more isue about touch id

How does Touch ID work?

Multiple iPhones are stacked showing the Touch ID sensor.
On an iOS device, there's a capacitive ring around the Touch ID sensor; on the new MacBook Pro, the entire Touch ID sensor is capacitive. When the sensor detects a finger, it triggers a high-resolution image capture. That image is converted into a mathematical representation, which is then sent through the hardware channel to a secure enclave. If the representation matches what's stored in the enclave, a "yes" token is released and the Touch ID action is authenticated. If not, a "no" token is released, and all you get is a digital head shake. Every time Touch ID scans a finger and recognizes it, it adds additional detail to the representation, theoretically to make it register even faster and better in the future.

Troubleshooting trippy Touch ID authentication

Here are a few tips and tricks to try if you're experiencing Touch ID issues:
  • During the registration process, make sure you move your finger around enough that the entire surface gets scanned during the first stage, and then every edge gets scanned during the second phase.
  • Any sweat or liquid on your finger at all can interfere with the scan. Wipe both your finger and the Home button off and dry then completely before using Touch ID.
  • The sequential improvement process can sometimes go off-track (i.e. instead of getting better, an error can occur and it can get worse). When that starts to happen, delete the fingerprint and re-register.
  • On an iOS device, make sure your finger is touching the capacitive metal ring and the Home button.
  • Touch ID is super fast these days, but you should still refrain from lifting your finger too quickly.
  • Try to keep your finger in one place when you're authenticating — you don't want to move your finger around too much.
  • If you're rockin' a screen protector or case, you don't want it to cover up the capacitive ring or the Home button — that could cause errors with Touch ID authentication.
  • If all else fails, it's time to head to the Apple Store for one-on-one support.

How to delete and re-add your Touch ID fingerprints

Sometimes you've just gotta burn it to the ground and start anew.

How to delete and re-add your Touch ID fingerprints on Mac

Serenity Caldwell put together an extensive guide on Touch ID for the new MacBook Pro. You can check it out at the link below!

How to delete and re-add your Touch ID fingerprints on iOS

If you're having trouble with Touch ID on an iOS device, here's how you wipe the slate clean and start again!
  1. Launch the Settings app.
  2. Tap on Touch ID & Passcode.
  3. Type in your Passcode when prompted.
  4. Tap on any fingerprint.
    Setting up Touch ID on iOS
  5. Tap on Delete Fingerprint. Repeat this until all your fingerprints are removed.
  6. Tap on Add a Fingerprint...
  7. Follow the on-screen prompts to set up a new fingerprint.
    Setting up Touch ID on iOS

How to create a new Apple ID on your iPhone or iPad

How to create a new Apple ID on your iPhone or iPad

  1. Open the Settings app.
  2. Tap iCloud.
  3. Tap Create a new Apple ID.
    Creating a new Apple ID on iPhone
  4. Enter a birth date.
  5. Tap Next.
  6. Enter your first and last name.
  7. Tap Next.
  8. Select your current email address or get a new iCloud email address.
    Entering birthday for new Apple ID on iPhone
  9. Enter your email address.
  10. Create a password.
  11. Verify the password.
  12. Select a security question.
  13. Type in answer.
  14. Repeat two more times.
    Entering security questions for new Apple ID on iPhone
  15. Agree to the Terms and Conditions.
  16. Tap Merge or Don't Merge to sync iCloud data from Safari, reminders, contacts and calendars.
  17. Tap OK to confirm Find My iPhone is turned on.
    Merging iCloud with new Apple ID on iPhone

How to sign out of iCloud on your iPhone or iPad

  1. Open the Settings app.
  2. Tap iCloud.
  3. Scroll down and tap Sign Out.
    Signing out of Apple ID on iPhone
  4. Tap Sign Out to confirm that all Photo Stream photos and iCloud Drive content will be removed from this iPhone.
  5. Tap Delete from My iPhone to confirm that all Notes stored in iCloud will be removed from this iPhone.
  6. Select delete or keep iCloud calendars, Safari, reminders, and contacts on iPhone.
    Deleting iCloud from iPhone
  7. enter password.
  8. Tap Turn off.
    Turn off iCloud on iPhone

How to sign in to iCloud with an existing Apple ID on your iPhone or iPad

  1. Open the Settings app.
  2. Tap iCloud.
  3. Enter the email address and password associated with your Apple ID.
  4. Tap Sign In.Signing in to Apple ID on iPhone
  5. Tap Merge or Don't Merge to sync iCloud data from Safari, reminders, contacts and calendars.
  6. Tap OK to confirm Find My iPhone is turned on.
    Merging content in iCloud on iPhone

Thursday 31 March 2016

How to build Laptop Protector

Discription:

Protect your valuable laptop against theft using this miniature alarm generator. Fixed in-side the laptop case, it will sound a loud alarm when someone tries to take the laptop. This highly sensitive circuit uses a homemade tilt switch to activate the alarm through tilting of the laptop case. The circuit uses readily available components and can be assembled on a small piece of Vero board or a general-purpose PCB.
It is powered by a 12V miniature battery used in remote control devices. IC TLO71 (IC1) is used as a voltage comparator with a potential divider comprising R2 and R3 providing half supply voltage at the non-inverting input (pin 3) of IC1. The inverting input receives a higher voltage through a water-activated tilt switch only when the probes in the tilt switch make contact with water.
When the tilt switch is kept in the horizontal position, the inverting input of IC1 gets a higher voltage than its non-inverting input and the output remains low. IC CD4538 (IC2) is used as a monostable with timing elements R5 and C1. With the shown values, the output of IC2 remains low for a period of three minutes. CD4538 is a precision monostable multivibrator free from false triggering and is more reliable than the popular timer IC 555.
Circuit diagram
circuit diagram


Its output becomes high when power is switched on and it becomes low when the trigger input (pin 5) gets a low-to-high transition pulse. The unit is fixed inside the laptop case in horizontal position. In this position, water inside the tilt switch effectively shorts the contacts, so the output of IC1 remains low. The alarm generator remains silent in the standby mode as trigger pin 5 of IC2 is low.
When someone tries to take the laptop case, the unit takes the vertical position and the tilt switch breaks the electrical contact between the probes Immediately the output of IC1 becomes high and monostable IC2 is triggered. The low output from IC2 triggers the pnp transistor (T1) and the buzzer starts beeping. Assemble the circuit as compactly as possible so as to make the unit matchbox size.
Make the tilt switch using a small (2.5cm long and 1cm wide) plastic bottle with two stainless pins as contacts. Fill two-third of the bottle with water such that the contacts never make electrical path when the tilt switch is in vertical position. Make the bottle leak-proof with adhesive or wax. Fix the tilt switch inside the enclosure of the circuit in horizontal position.
Fit the unit inside the laptop case in horizontal position using adhesive. Use a miniature buzzer and a micro switch (S1) to make the gadget compact. Keep the laptop case in horizontal position and switch on the unit. Your laptop is now protected.


How to build Personal alarm

Circuit Diagram:

Personal alarm-Circuit diagram


PARTS:

  • R1 330K 1/4W Resistor
  • R2 100R 1/4W Resistor
  • C1 10nF 63V Polyester or Ceramic Capacitor
  • C2 100µF 25V Electrolytic Capacitor
  • Q1 BC547 45V 100mA NPN Transistor
  • Q2 BC327 45V 800mA PNP Transistor
  • SW1 Reed Switch and small magnet (See Notes)
  • SPKR 8 Ohm Loudspeaker (See Notes)
  • B1 3V Battery (two A or AA cells wired in series etc.)

Device Purpose:

This circuit, enclosed in a small plastic box, can be placed into a bag or handbag. A small magnet is placed close to the reed switch and connected to the hand or the clothes of the person carrying the bag by means of a tiny cord. If the bag is snatched abruptly, the magnet looses its contact with the reed switch, SW1 opens, the circuit starts oscillating and the loudspeaker emits a loud alarm sound. The device can be reverse connected, i.e. the box can be placed in a pocket and the cord connected to the bag. This device can be very useful in signalling the opening of a door or window: place the box on the frame and the magnet on the movable part in a way that magnet and reed switch are very close when the door or window is closed.

Circuit operation:

A complementary transistor-pair is wired as a high efficiency oscillator, directly driving a small loudspeaker. Low part-count and 3V battery supply enable a very compact construction.

Notes:

  • The loudspeaker can be any type, its dimensions are limited only by the box that will contain it.
  • An on-off switch is unnecessary because the stand-by current drawing is less than 20µA.
  • Current consumption when the alarm is sounding is about 100mA.
  • If the circuit is used as anti-bag-snatching, SW1 can be replaced by a 3.5mm mono Jack socket and the magnet by a 3.5mm. mono Jack plug with its internal leads shorted. The Jack plug will be connected with the tiny cord etc.
  • Do not supply this circuit with voltages exceeding 4.5V: it will not work and Q2 could be damaged. In any case a 3V supply is the best compromise.

How to build Ni -Cd Batteries Charger

Circuit Diagram

Ni -Cd Batteries Charger-Circuit diagram


Board Layout:


Ni -Cd Batteries Charger

parts use in it:

  • D1-4 = 1N4001
  • IC1 = 7808 (voltage regulator)
  • C1 = 1000uF/16V
  • C2 = 1uF/63V
  • IL1-4 = 6V/0,05A BULB
  • BH1-4 = AA BATTERY-HOLDER
  • F1 = 20mA FUSE + HOLDER
  • T1 = TRANSFORMER (10V/0,25A)

Cell Phone Detector circuit diagram and its work

The most common electronic equipment used is cell phones. With advancement in communication technology, the requirement of cell phones has increased manifold. A cell phone typically transmits and receives signals in the frequency range of 0.9 to 3GHz. This article provides a simple circuit to detect the presence of an activated cell phone by detecting these signals.

Basic Principle of Mobile Phone Detector Circuit:

The basic principle behind this circuit is the idea of using a Schottky diode to detect the cell phone signal. Mobile phone signal is in the frequency range of 0.9 to 3GHZ.  Schottky diodes have a unique property of being able to rectify low frequency signals, with low noise rate. When an inductor is placed near the RF signal source, it receives the signal through mutual induction. This signal is rectified by the Schottky diode. This low power signal can be amplified and used to power any indicator like an LED in this case.

Circuit Diagram of Cell Phone Detector:Cell Phone Phone Detector Circuit Diagram

Circuit Components:
  • V1 = 12V
  • L1 = 10uH
  • R1 = 100Ohms
  • C1 = 100nF
  • R2 = 100K
  • R3 = 3K
  • Q1 = BC547
  • R4 = 200 Ohms
  • R5 = 100 Ohms
  • IC1= LM339
  • R6 = 10 Ohms
  • LED = Blue LED

Cell Phone Detector Circuit Design:

Detector Circuit Design:
The detector circuit consists of an inductor, diode, a capacitor and a resistor.  Here an inductor value of 10uH is chosen. A Schottky diode BAT54 is chosen as the detector diode, which can rectify low frequency AC signal. The filter capacitor chosen in a 100nF ceramic capacitor, used to filter out AC ripples. A load resistor of 100 Ohms is used.
Amplifier Circuit Design:
Here a simple BJT BC547 is used in common emitter mode. Since the output signal is of low value, the emitter resistor is not required in this case. The collector resistor value is determined by the value of battery voltage, collector emitter voltage and collector current. Now the battery voltage is chosen to be 12 V (since maximum open source collector emitter voltage for BC 547 is 45V), operating point collector emitter voltage is 5 V and collector current is 2 mA. This gives a collector resistor of approx 3 K. Thus a 3 K resistor is used as Rc. The input resistor is used to provide bias to the transistor and should be of larger value, so as to prevent the flow of maximum current. Here we chose a resistor value of 100 K.
Comparator circuit Design:
Here LM339 is used as comparator. The reference voltage is set at the inverting terminal using a potential divider arrangement. Since output voltage from the amplifier is quite low, the reference voltage is set low of the order of 4V. This is achieved by selecting a resistor of 200 Ohms and a potentiometer of 330 Ohms.  An output resistor of value 10 Ohms is used as a current limiting resistor.

Mobile Phone Tracking Circuit Operation:

In normal condition, when there is no RF signal, the voltage across the diode will be negligible. Even though this voltage is amplified by the transistor amplifier, yet the output voltage is less than the reference voltage, which is applied to the inverting terminal of the comparator. Since the voltage at non inverting terminal of the OPAMP is less than the voltage at the inverting terminal, the output of the OPAMP is low logic signal.
Now when a mobile phone is present near the signal, a voltage is induced in the choke and the signal is demodulated by the diode. This input voltage is amplified by the common emitter transistor. The output voltage is such that it is more than the reference output voltage. The output of the OPAMP is thus a logic high signal and the LED starts glowing, to indicate the presence of a mobile phone. The circuit has to be placed centimeters away from the object to be detected.Cell Phone Phone Detector Circuit Diagram

Cell Phone signal Jammer Circuit diagram

Mobile Jammer Circuit DiagramCell Phone Jammer Circuit Explanation:


  • If you understand the above circuit, this circuit analysis is simple and easy. For any jammer circuit, remember that there are three main important circuits. When they are combined together, the output of that circuit will work as a jammer. The three circuits are
    1. RF amplifier.
    2. Voltage controlled oscillator.
    3. Tuning circuit.
  • So the transistor Q1, capacitors C4 & C5 and resistor R1 constitute the RF amplifier circuit. This will amplify the signal generated by the tuned circuit. The amplification signal is given to the antenna through C6 capacitor. Capacitor C6 will remove the DC and allow only the AC signal which is transmitted in the air.
  • When the transistor Q1 is turned ON, the tuned circuit at the collector will get turned ON. The tuned circuit consists of capacitor C1 and inductor L1. This tuned circuit will act as an oscillator with zero resistance.
  • This oscillator or tuned circuit will produce the very high frequency with minimum damping. The both inductor and capacitor of tuned circuit will oscillate at its resonating frequency.
  • The tuned circuit operation is very simple and easy to understand. When the circuit gets ON, the voltage is stored by the capacitor according to its capacity. The main function of capacitor is to store electric energy. Once the capacitor is completely charged, it will allow the charge to flow through inductor. We know that inductor is used to store magnetic energy. When the current is flowing across the inductor, it will store the magnetic energy by this voltage across the capacitor and will get decreased, at some point complete magnetic energy is stored by inductor and the charge or voltage across the capacitor will be zero. The magnetic charge through the inductor will decreased and the current will charge the capacitor in opposite or reverse polarity manner. Again after some period of time, capacitor will get completely charged and magnetic energy across the inductor will be completely zero. Again the capacitor will give charge to the inductor and becomes zero. After some time, inductor will give charge to capacitor and become zero and they will oscillate and generate the frequency.
  • This circle run upto the internal resistance is generated and oscillations will get stop. RF amplifier feed is given through the capacitor C5 to the collector terminal before C6 for gain or like a boost signal to the tuned circuit signal. The capacitors C2 and C3 are used for generating the noise for the frequency generated by the tuned circuit. Capacitors C2 and C3 will generate the electronic pulses in some random fashion (technically called noise).
  • The feedback back or boost given by the RF amplifier, frequency generated by the tuned circuit, the noise signal generated by the capacitors C2 and C3 will be combined, amplified and transmitted to the air.
  • Cell phone works at the frequency of 450 MHz frequency. To block this 450MHz frequency, we also need to generate 450Mhz frequency with some noise which will act as simple blocking signal, because cell phone receiver will not be able to understand to which signal it has been received. By this, we can able to block the cell phone signal from reaching the cell phones.
  • So here in the above circuit, we generated the 450 MHz frequency to block the actual cell phone signal. That’s what the above circuit will act as a jammer for blocking the actual signal.

formate of cv

Text Box:  C.V

Muhammad HamzaBaig
S/o
AurangZaib
Vill. BurhanPur (Chuhan)
Tehsil & Post Office Pasrur District Sialkot,
Pakistan


Personal Information

Date & Place of Birth:                                                       June 21 1996 – Sialkot
Domicile:                                                                              Sialkot-Punjab
Citizenship #:                                                                      34602-0141959-1
Marital Status:                                                                    Single
Blood Group:                                                                       B + eve
Contact #:                                                                            0306-6629487
E-Mail:                                                                                   Hamzabaig1111@gmail.com

Objectives

My objective is to become a part of an organization which is dynamic & thriving among its competitors and get myself in a challenging position, an opportunity which not only enable me to fulfill my dream career but also to contribute toward achievement of organizational goals to prosperity and growth.
I have passion to work in teams which work together in stimulated environment through my dedication and loyalty to my assignments.

Profile

Well disciplined and positive attitude.


Academic Summary


  • Diploma of Associate Engineering                                                                 2013-2016

Government College of Technologies Sialkot
(Punjab Board of Technical Education Lahore)

  • Matriculation Certification                                                                    2012-2013

Marks in Metric’s Examination 743/1050                                     (A Grade)


Higher secondary school education in the field of Science from Govt. High School # 02Pasrur Sialkot (Board of Intermediate & Secondary Education Gujranwala)


Projects during Study:

·         Traffic light Controller
·         Laser Security system
·         LCD with Polarized goggles
·         Auto Water Level Project
·         Electrical Cycle
·         Solar tube well system


Achievements

Participate in Punjab Youth Festival and was a Leader of college team which participated in this Festival.

Participate three times in Project Exhibition in Govt. College of Technologies Sialkot and got award of best student.


Computer Literacy

·         Microsoft Word
·         Microsoft Excel
·         Microsoft Power Point
·         Internet and Email
·         Window installation


Interests

·         Reading Books
·         Playing Chess
·         Searching on technology
·         Playing football


Featured Post

All Answers of Quiz regarding to this course on Fiverr "Online Freelancing Essentials: Be A Successful Fiverr Seller"

To Clear All quiz of mentioned Course you can have a look on or check questions answers as well. Course name:  Online Freelancing Essentials...

Popular Posts